Category: All Canadian provinces and territories

  • Fuel-Efficient Driving Tips in Canada: Idling and Tire Pressure

    Fuel-Efficient Driving Tips in Canada: Idling and Tire Pressure

    Photo: Wiki.cullin, CC0, via Wikimedia Commons

    Fuel-efficient driving in Canada comes down to a few habits from the provincial handbooks: drive at a steady speed, accelerate gently, stay at or below the speed limit, keep your tires properly inflated and switch the engine off instead of idling. Saskatchewan’s SGI handbook says cutting your highway cruising speed from 120 km/h to 100 km/h alone can reduce fuel use by up to 20%.

    Eco-driving habits the handbooks recommend

    Habit What the handbook says
    Steady speed, smooth acceleration Aggressive driving with rapid acceleration and hard braking can raise fuel use by about 40% (SGI) or up to 25% (MPI), both citing European tests.
    Keep to the speed limit 120 km/h to 100 km/h: up to 20% less fuel (SGI, MPI). NWT: every 10 km/h above 90 km/h burns 10% more fuel.
    Be a smooth operator BC: avoid “jackrabbit” starting and stopping and drive at a steady speed.
    Plan trips Combine errands. Trips under 5 km never let the engine reach its best operating temperature (SGI, MPI). BC suggests driving to the furthest stop first.
    Cruise control on the highway Saves fuel on flat highways (Ontario, SGI). On hills, let speed drop slightly going up (SGI, MPI). Never on slippery or winter roads.
    Air conditioning Can raise fuel use by more than 20% in city driving (SGI, MPI). In town, use windows; at highway speeds, use vents, because open windows add drag.
    Manual transmission Shift at the engine speeds your owner’s manual recommends; a tachometer helps (SGI, MPI).

    BC’s ICBC handbook sums it up: good safe-driving habits can reduce fuel use by as much as 30%.

    Is idling bad for your car and your wallet?

    Every handbook says avoid it. The details differ:

    • Ontario: turn off your vehicle if parked for more than 10 seconds. Even in cold weather, engines warm up within 30 seconds.
    • Saskatchewan and Manitoba: idling for more than 10 seconds, except in traffic, wastes more fuel than stopping and restarting.
    • NWT: ten seconds of idling can use more fuel than restarting. Most engines need no more than 30 seconds of idling to circulate oil; the best way to warm up the rest of the car is to drive it.
    • British Columbia: turn the motor off if stopped for more than 60 seconds, for example at the side of the road.

    Remote starters and block heaters

    • Do not start the car too early with a remote starter; long idling wastes fuel (SGI, MPI).
    • A block heater on a timer helps in winter and can improve overall fuel economy by up to 10%. SGI says switch it on two hours before you drive; MPI says four hours. Do not leave it on overnight.

    Municipal anti-idling bylaws

    Many Canadian cities have their own idling limits, enforced with fines. One example: the City of Toronto’s Idling Control By-law limits idling to no more than one minute in a 60-minute period (as of November 2026). Rules, exemptions and fines differ by city, so check your own municipality’s website.

    Maintenance that saves fuel

    • Tire pressure: check at least monthly when the tires are cold, using the figure on the door, glove box or owner’s manual. SGI: tires under-inflated by a total of 10 psi raise fuel use by 5%. MPI: one tire under-inflated by 56 kPa (8 psi) can raise fuel use by 4% and cut 15,000 km off the tire’s life.
    • Air filter: replace it on the schedule in your owner’s manual. The SGI, MPI and NWT handbooks say a clogged filter can raise fuel use by up to 10%, but the US Department of Energy says a fuel saving only applies to older carbureted engines, and puts it at a few percent. On modern fuel-injected and diesel engines, a new filter can help acceleration but does not improve fuel economy (fueleconomy.gov).
    • Tune-ups: NWT says a poorly tuned engine can increase fuel use by up to 50%. Ontario lists worn spark plugs, dragging brakes and transmission problems.
    • Alignment: check regularly to cut tire wear and fuel use (Ontario).
    • Weight and drag: remove heavy items, wet snow, winter sand or salt, and take off roof racks and boxes when not in use (Ontario).
    • Fuelling: do not “top off” the tank; spilled fuel releases harmful vapours (Ontario).

    For a full pre-drive and periodic check, see our car controls guide.

    Driving less

    Ontario and BC both suggest the simplest saving: walk, cycle, carpool or take transit for some trips, and avoid rush hour where you can. Ontario adds: pay attention to smog alerts.

    Buying a car with fuel economy in mind

    The NWT manual says to consider fuel-efficient models first; generally, a smaller engine uses less fuel. Look for the vehicle’s EnerGuide label, which shows its fuel consumption and estimated annual fuel cost. Manitoba’s handbook also says to check fuel efficiency before buying or leasing. For inspection and registration steps, see buying your first car in Canada.

    Province by province

    • Ontario: MTO handbook, “Driving efficiently”.
    • British Columbia: Learn to Drive Smart, chapter 2, “Driving and the environment”.
    • Manitoba: MPI handbook, “Fuel Efficient Driving Techniques”.
    • Saskatchewan: SGI handbook, “Fuel-efficient driving techniques”.
    • NWT: Driver’s Manual, “Ways to improve fuel efficiency”.
    • Others: check your provincial handbook.

    Winter brings extra fuel and safety considerations: see winter driving in Canada. For the full licensing path, start at learning to drive in Canada.

    Sources

    • Government of Ontario, “The Official MTO Driver’s Handbook: Driving efficiently” (ontario.ca)
    • ICBC, “Learn to Drive Smart” (icbc.com)
    • Manitoba Public Insurance, “Manitoba Driver’s Handbook: Fuel Efficient Driving Techniques, Environmental Consequences of Driving” (apps.mpi.mb.ca)
    • SGI, “Saskatchewan Driver’s Handbook” (sgi.sk.ca)
    • Government of the Northwest Territories, “NWT Driver’s Manual: Basic” (idmv.inf.gov.nt.ca)
    • City of Toronto, “Idling and Air Quality” (toronto.ca)
    • US Department of Energy and EPA, “Keeping Your Vehicle in Shape” (fueleconomy.gov)
  • Two-Way Left-Turn Lane Rules in Canada, Plus Dual Turn Lanes

    Two-Way Left-Turn Lane Rules in Canada, Plus Dual Turn Lanes

    Photo: Chicken4War, CC BY-SA 4.0, via Wikimedia Commons

    A two-way left-turn lane is the centre lane shared by left-turning traffic from both directions. In Canada, you signal, move into it shortly before your turn, slow down, wait opposite the street or driveway you want, and turn when it is clear. It is not a passing lane or a driving lane. Saskatchewan’s handbook adds that where one is provided, you may not turn left from any other lane.

    How to use a two-way left-turn lane, step by step

    1. Check mirrors and signal left.
    2. Enter the centre lane close to your turn. Ontario says “shortly before your turn”. Saskatchewan says enter only at the point next to the property you want to reach.
    3. Slow down and move up to a spot opposite the road or driveway (Ontario).
    4. Watch for drivers coming the other way who are using the same lane to turn left. When they wait in front of you, they can block your view of oncoming traffic (Ontario, BC).
    5. Turn only when the way is clear.

    Turning left out of a driveway

    Saskatchewan’s SGI handbook says that when leaving a driveway or parking lot, you pick a gap, then drive through the centre turning lane and into the first available driving lane as quickly as possible. You do not sit in the centre lane and then merge later.

    What you must not do in a centre turn lane

    • Use it to pass (Ontario, Saskatchewan).
    • Use it as a driving lane (Saskatchewan).
    • Enter it far from where you will turn. Alberta’s Driver’s Guide says to enter only close to where you will be turning.
    • Turn left from another lane where a centre turning lane is provided (Saskatchewan).

    How far can you drive in a two-way left-turn lane?

    Provincial handbooks (Ontario, BC, Alberta, Saskatchewan, NWT) describe the position rather than a distance in metres: enter shortly before, or next to, the place you are turning. If you see a figure quoted online, check it against your provincial handbook or traffic act before relying on it. Always follow the signs and markings on the road.

    How to recognize a two-way left-turn lane

    • A centre lane marked by a solid line and a broken line on each side. ICBC notes the markings may be reversed: solid lines inside the broken lines.
    • A sign showing opposing left-turn arrows (Saskatchewan shows this sign in its handbook).
    • Alberta’s guide notes you may cross the solid yellow line to enter the lane.

    Study the pavement markings chapter of your provincial handbook so you can spot these lanes on the knowledge test.

    Dual (multiple) turning lanes

    At large intersections there may be two lanes turning left or two turning right. The usual rule is the same: stay in your lane through the turn and finish in the matching lane.

    Handbook What it says
    BC (ICBC) Read the pavement markings, lane-use signs and signals. Turning from the far-left lane, finish in the far-left lane; from the lane next to it, finish in the lane next to the far-left lane.
    Northwest Territories Approach in one of the marked lanes and turn into the corresponding lane. Dual turns are allowed only where indicated. Never swing wide or change lanes, because another vehicle could be turning beside you.
    Alberta The Driver’s Guide describes dual left and dual right turn lanes the same way: approach in the marked lane, turn into the matching lane, no swinging wide or changing lanes in the intersection.
    Ontario Where left-turn lanes are marked, turn from the marked lane and keep that lane position as you turn onto the other road.

    Scenario

    You are in the inside (left) of two left-turn lanes. Halfway through the turn you realize you need the right lane on the new road. Finish the turn in the left lane, then signal, check your mirror and blind spot and change lanes once you are on the new road. Cutting across during the turn is exactly what the NWT manual warns against.

    Regular left-turn lanes

    A single marked left-turn lane at an intersection lets you wait for a gap without holding up through traffic. ICBC says use the lane with the arrows only if you are turning left. For how to judge gaps and who yields, see the intersection guides for your province:

    Other provinces: check your provincial handbook. For the full licensing path, start at learning to drive in Canada.

    Sources

    • Government of Ontario, “The Official MTO Driver’s Handbook: Changing directions” (ontario.ca)
    • ICBC, “Learn to Drive Smart” (icbc.com)
    • SGI, “Saskatchewan Driver’s Handbook” (sgi.sk.ca)
    • Government of the Northwest Territories, “NWT Driver’s Manual: Basic” (idmv.inf.gov.nt.ca)
    • Government of Alberta, “Driver’s Guide to Operation, Safety and Licensing” (open.alberta.ca)
  • Driver’s Licence Classes in Ontario and Across Canada

    Driver’s Licence Classes in Ontario and Across Canada

    Photo: Raysonho, CC0, via Wikimedia Commons

    Ontario uses letters for its driver’s licence classes: G (with G1 and G2 as the learner and novice levels) for cars, M for motorcycles, and A, B, C, D, E and F for trucks and buses. Almost every other province and territory uses numbers instead, with Class 5 as the regular car licence and Class 7 (or a lettered stage such as 5L) as the learner level. Whichever system you are in, the rule is the same: the class on your licence must match the vehicle you drive.

    Ontario driver’s licence classes (A to M)

    The MTO handbook says Ontario has 12 licence classes. The main ones:

    Class What you can drive Also covers
    A Any tractor-trailer combination D, G
    B Any school purposes bus C, D, E, F, G
    C Any regular bus D, F, G
    D Motor vehicle over 11,000 kg gross weight, or a truck or combination where the towed vehicle is not over 4,600 kg G
    E School purposes bus, maximum 24 passengers F, G
    F Regular bus, maximum 24 passengers, and ambulances G
    G Any car, van or small truck, or a vehicle and towed vehicle up to 11,000 kg where the towed vehicle is not over 4,600 kg Not applicable
    G1 Level One: Class G vehicles with an accompanying fully licensed driver with at least four years’ experience, plus other conditions Not applicable
    G2 Level Two: Class G vehicles without an accompanying driver, with conditions Not applicable
    M Any motorcycle, including motor tricycles, limited-speed motorcycles and mopeds G under G1 conditions
    M1, M2 Graduated motorcycle levels M2: G under G1 conditions

    Ontario also has an M with L condition (limited-speed motorcycle or moped only), M with M condition (motor tricycle only), and a Class D with RV restriction (“Q”) for recreational vehicles of any weight.

    Ontario endorsements

    • Z endorsement: needed to drive any vehicle with air brakes.
    • RV (“T”) endorsement: lets Class E, F and G holders drive a recreational vehicle up to 14,000 kg.

    What licence does an Ontario car learner need?

    A G1. You then move to G2 and finally full G. Ontario requires a Class G before you can be licensed for any other class; the only exception is a motorcycle (Class M). See learning to drive in Ontario for the full G1, G2 and G path.

    Numbered licence classes in the rest of Canada

    Most provinces and territories use classes 1 to 7, sometimes with 8 and 9. The pattern is broadly similar:

    Class General meaning
    1 Semi-trailer trucks (tractor-trailers)
    2 Large buses, including school buses
    3 Large trucks (three or more axles)
    4 Small buses, taxis and ambulances
    5 Cars, vans and light trucks: the regular licence
    6 Motorcycles
    7 Learner stage in many provinces

    Exact weights, seat counts and age limits vary. Always check your provincial handbook. Two examples below show how much detail can differ.

    PEI licence classes 1 to 9

    Class Vehicles Minimum age
    1 Truck-tractor and trailer combinations with air brakes (not a bus with passengers). Also allows classes 3, 5, 8 and 9. 19
    2 Buses carrying more than 24 passengers, including school buses. Also allows classes 3, 4, 5, 8 and 9. 19 (21 for a school bus)
    3 Trucks over 14,000 kg gross mass, special mobile equipment and gooseneck trailers. Also allows 5, 8 and 9. 19
    4 Ambulances, taxis and buses carrying 24 passengers or fewer. Also allows 5, 8 and 9. 19
    5 Vehicles up to 14,000 kg, towing up to 4,500 kg (not motorcycles or buses with passengers). Also allows 8 and 9. 17
    6 Motorcycles. Also allows class 8. 17
    7 Instruction permit: classes 5, 6, 8 and 9 with an accompanying licensed driver 16
    8 Mopeds (pedal-assisted) 17
    9 Farm tractors (no road test required) 14

    PEI’s handbook says drivers in the Graduated Driver Licensing program must exit Stage 3 before they can get a Class 1, 2, 3 or 4 licence. See learning to drive in PEI.

    Northwest Territories licence classes 1 to 7

    Class Vehicles Minimum age
    1 Any vehicle or combination except a motorcycle 18
    2 Buses of any seating capacity, plus classes 3, 4 and 5 18
    3 Single vehicles with three or more axles; combinations where the towed vehicles do not exceed 4,500 kg; plus classes 4 and 5 18
    4 Buses up to 24 passengers, taxis, ambulances, plus class 5 18
    5 Two-axle vehicles (not a motorcycle, bus, taxi or ambulance), towing up to 4,500 kg, recreational vehicles, mopeds 16
    6 Motorcycles 16
    7 Learner’s licence for Class 5 vehicles (and motorcycles, for learning) 15

    The NWT uses 5P and 6P for the probationary stage. An air brake “Q” endorsement is needed for vehicles with air brakes. See learning to drive in the NWT.

    Can you upgrade to a commercial class while on GDL?

    Usually not. By jurisdiction:

    Jurisdiction Rule
    Ontario You need a Class G before any other class (except M).
    PEI Must exit Stage 3 of GDL before Class 1, 2, 3 or 4.
    NWT A probationary driver cannot upgrade to Class 1, 2, 3 or 4, and cannot apply for those classes as a probationary driver.
    Saskatchewan Novice drivers cannot obtain a commercial driver’s licence or school bus endorsement.
    Manitoba A minimum Class 5I (Intermediate) or 5A (Authorized Instruction) licence is needed to get authorized instruction in classes 2 to 4. Class 1 instruction needs a full Class 5F, and a Mandatory Entry-Level Training (MELT) course before the Class 1 road test.

    Other provinces: check your provincial handbook or licensing office before planning a commercial career around your licence dates.

    Learner class names by province

    • Ontario: G1
    • British Columbia: Class 7L (learner), then Class 7 (novice), then Class 5
    • Manitoba: Class 5L (learner), 5I (intermediate), 5F (full)
    • PEI and NWT: Class 7

    The Canadian driving licence glossary explains every code. Towing a trailer can push you into a different class: see towing a trailer as a new driver. For the full picture, start with learning to drive in Canada.

    Sources

    • Government of Ontario, “The Official MTO Driver’s Handbook: Getting your driver’s licence” (ontario.ca)
    • Government of Prince Edward Island, “Driver’s Handbook” (princeedwardisland.ca)
    • Government of the Northwest Territories, “NWT Driver’s Manual: Basic” (idmv.inf.gov.nt.ca)
    • SGI, “Saskatchewan Driver’s Handbook” (sgi.sk.ca)
    • Manitoba Public Insurance, “Class Licence System” (apps.mpi.mb.ca)
    • ICBC, “Learn to Drive Smart” (icbc.com)
  • Car Controls for Beginners in Canada: Seat, Mirrors and Gears

    Car Controls for Beginners in Canada: Seat, Mirrors and Gears

    Photo: ZhiCheng Zhang, Pexels

    Before your first drive in Canada, set up the car in this order: seat, head restraint, mirrors, seatbelt. Sit upright with a slight bend in your knees and elbows, at least 25 cm (10 inches) back from the steering-wheel airbag, and hold the wheel at “9 and 3”. That is what the ICBC, SGI and NWT handbooks teach. Then learn where every control is so you can use the wipers, lights and defroster without looking down.

    Car set-up checklist before you drive

    1. Seat, then head restraint, then mirrors, then seatbelt.
    2. Steering wheel adjusted if it tilts or telescopes.
    3. Doors locked, loose items stored.
    4. Know where the lights, wipers, horn, hazard lights and defroster are.

    ICBC says never adjust your seat or steering wheel while the vehicle is moving.

    How to adjust your seat

    Handbook Seat position test
    BC (ICBC) Sit upright with the small of your back pushed into the seat. With your right foot you can reach the floor behind the brake pedal and still have a slight bend in your leg. Arms slightly bent on the wheel. Left foot rests to the left of the brake or clutch.
    Saskatchewan (SGI) Sit well back. Move the seat so your right foot is on the floor under the brake and your leg stays slightly bent even when you push hard. Your eye line should be about halfway between the top of the wheel and the top of the windshield, with at least a fist’s space above your head. Use a cushion if needed.
    Ontario (MTO) Sit high enough to see over the wheel and hood and to see the ground four metres in front. Check by placing your feet flat on the floor under the brake pedal without stretching. Elbows slightly bent.

    Airbag distance

    ICBC and the NWT manual (citing Transport Canada) both say to sit at least 25 cm (10 inches) from the steering wheel airbag. Airbags do not replace seatbelts: every handbook says to buckle up anyway.

    How high should the head restraint be?

    • BC: top at least level with the top of your head, and as close to the back of your head as possible. ICBC says closer restraints can be twice as effective at preventing injury.
    • Saskatchewan: top edge level with the top of your head.
    • NWT: centre of the restraint level with the top of your ears, with less than 10 cm (4 inches) between your head and the restraint.
    • Ontario: the back of your head should be directly in front of the middle of the restraint.

    The aim is the same in all of them: a well-placed restraint helps prevent whiplash in a rear-end crash. Check passengers’ restraints too.

    Setting your mirrors to cut blind spots

    1. Inside mirror: frame as much of the rear window as possible, with your head where it will be while driving.
    2. Left mirror: lean your head toward the driver’s window, then set the mirror so you can just see the side of your car (Ontario, SGI).
    3. Right mirror: lean toward the centre of the car and set it so you can just see a sliver of the right side.

    Set this way, the side mirrors pick up where the inside mirror leaves off. Mirrors never cover everything: Ontario says shoulder checks are the only way to be sure your blind spots are clear. Some side mirrors are convex; ICBC warns they make vehicles look smaller and further away.

    Where to put your hands on the steering wheel

    Handbook Recommended hand position
    BC 9 and 3, or 10 and 2. With a steering-wheel airbag, 9 and 3 or even 8 and 4 may be better, because at 10 and 2 your hands could hit your face if the airbag deploys.
    Saskatchewan 9 and 3, or 8 and 4. A hand on top of the wheel can be forced into your face by the airbag.
    NWT 9 and 3.

    Keep both hands on the outside of the wheel (ICBC). Never steer with one finger or the flat palm of your hand (Ontario).

    Hand-over-hand vs push-pull steering

    This is where the handbooks differ most.

    • Ontario: teaches hand-over-hand for sharp turns. After the turn, relax your grip and let the wheel slip, or feed it through your hands, back to straight.
    • NWT: hand-over-hand to turn and hand-over-hand to straighten out again.
    • Saskatchewan: for normal steering, keep your grip in place and twist the wheel until your forearms touch. Beyond that, use either hand-over-hand (for sharp turns at low speed or in slippery emergencies) or hand-to-hand, also called push-pull. SGI says to unwind with hand-over-hand and not to let the wheel slide through your hands, because you lose control of where it stops. It notes push-pull keeps your hands from crossing the wheel, which lowers the chance of injury from the airbag.

    For the road test, use the method your provincial handbook teaches and ask your instructor which one examiners expect.

    Gearshift positions explained

    Position What it is for
    P (Park) Starting the engine and parking. Locks the transmission.
    R (Reverse) Backing up. Turns on the white reversing lights.
    N (Neutral) Out of gear. ICBC: use it to restart the engine if the car stalls while moving.
    D (Drive) Normal forward driving; the car changes gear itself.
    L, 1, 2, 3 Lower gears that stop the transmission shifting up. Use for steep hills or heavy loads (ICBC, NWT).

    Some cars also have an overdrive setting, which the NWT manual says saves fuel at higher speeds. Check your owner’s manual for your car’s layout.

    Standard (manual) transmission and the clutch

    • Clutch with your left foot only; brake and gas with your right foot (ICBC).
    • Start the engine in neutral with the clutch fully pressed (NWT).
    • The “friction point” is where the clutch starts to connect as you lift it. Balance it with the gas for a smooth start without stalling (NWT).
    • Do not “ride the clutch” by resting your foot on it while moving; it wears the clutch out (ICBC, NWT).
    • When stopping, brake first and press the clutch just before you stop, so you are not coasting (ICBC).

    Deciding which to take your road test in? See automatic or manual for your road test.

    Accelerating and braking smoothly

    • Press the accelerator gradually and let the car build speed (SGI). NWT: do not accelerate so hard your tires spin.
    • Use your right foot for both pedals so you never press both at once (Ontario).
    • Learn how much pressure your brakes need. Power brakes need less than standard brakes (ICBC).
    • Wear proper shoes: ICBC warns against high heels and platform soles.

    Wipers, defroster and lights: learn them without looking

    Ontario says you should be able to turn on the wipers and washers, headlights, high beams, heater and defroster without taking your eyes off the road. Practise in the driveway with the engine off. ICBC adds: know every wiper speed and how to use the washer, and keep the blades in good condition. Never use cruise control on wet, snowy or icy roads, in city traffic, on winding roads or when you are tired (ICBC).

    Dashboard warning lights

    ICBC’s handbook shows a typical control panel. The lights that matter most to a learner:

    Light What it means
    Brake warning Parking brake is on. If it comes on while using the foot brake, the brake system may not be working properly: have it checked.
    ABS If it stays on after you start the car, the anti-lock system may have a fault.
    Airbag If it comes on while driving, there may be an airbag fault.
    Oil pressure Shows oil pressure, not how much oil is in the engine.
    Engine temperature Coolant temperature; warns if the engine is overheating.
    Alternator / battery Whether the battery is charging.
    Check engine A possible engine fault.
    Low tire pressure One or more tires are low.
    Electronic stability control Shows the car is equipped with electronic stability control.
    High beam indicator Usually blue: your high beams are on.

    Colours and symbols vary between makes, so check your owner’s manual. Ontario’s rule of thumb: if a warning light stays on after you drive away, it could mean a serious problem.

    Pre-trip and periodic checks

    ICBC recommends a quick walk-around before every drive: tires, lights and signals, glass, fluid patches under the car, and nothing in front or behind. Every few weeks, do a fuller check of oil, coolant, washer fluid, brake fluid, hoses, belts, lights, wipers and tire pressure (checked cold, using the figure on the driver’s door or in the manual, not the number on the tire). For what your car needs to pass inspection before a road test, see road test car checklist for Canada.

    Next steps: learn how to handle problems in car emergencies in Canada, look up terms in the Canadian driving licence glossary, or start at learning to drive in Canada.

    Sources

    • ICBC, “Learn to Drive Smart” (icbc.com)
    • SGI, “Saskatchewan Driver’s Handbook” (sgi.sk.ca)
    • Government of the Northwest Territories, “NWT Driver’s Manual: Basic” (idmv.inf.gov.nt.ca)
    • Government of Ontario, “The Official MTO Driver’s Handbook: Getting ready to drive” (ontario.ca)
    • Government of Ontario, “The Official MTO Driver’s Handbook: Changing directions” (ontario.ca)
    • Government of Ontario, “The Official MTO Driver’s Handbook: Stopping” (ontario.ca)
  • Drowsy Driving in Canada: Warning Signs, Breaks and Penalties

    Drowsy Driving in Canada: Warning Signs, Breaks and Penalties

    Photo: Ken Lund, CC BY-SA 2.0, via Wikimedia Commons

    Drowsy driving in Canada is treated as a form of impairment. Alberta’s government says plainly that driving while tired is impaired driving, and in the Northwest Territories police can give you a 24-hour roadside suspension if they have reasonable grounds to suspect you are fatigued. If you notice the warning signs below, the only real fix is to get off the road and rest.

    Warning signs that you are too tired to drive

    Ontario’s MTO handbook lists eight signs that drowsiness has reached a dangerous level. In plain terms:

    1. You struggle to keep your eyes open.
    2. Your head keeps nodding forward.
    3. Your mind wanders and you cannot concentrate.
    4. You keep yawning.
    5. You cannot remember the last few kilometres.
    6. You miss traffic lights or signals.
    7. You drift into the next lane and jerk back.
    8. You drift off the road and only just avoid a crash.

    Ontario says if you have even one of these, you may be about to fall asleep, and research shows you can fall asleep without being aware of it.

    Other handbooks add earlier clues:

    • Saskatchewan: an early sign is that you stop scanning properly and stare straight ahead instead of looking well down the road.
    • Alberta: fatigue can leave you unable to react to something on the road, taking bigger risks, reacting more emotionally or aggressively, and closing your eyes for longer.
    • Nova Scotia: “highway hypnosis” can leave you disoriented and drowsy on long, steady drives.

    Is drowsy driving illegal in Canada?

    Jurisdiction What the official source says
    Alberta Driving while tired is impaired driving. Being awake for 17 to 19 hours is equivalent to a blood alcohol content of 0.05%.
    Northwest Territories Driving fatigued is considered impaired driving. You can be issued a 24-hour roadside suspension if there are reasonable grounds to suspect you are fatigued (Motor Vehicles Act, section 116.1).
    Ontario The handbook says tired drivers can be as impaired as drunk drivers, with slower reactions and less alertness.
    Manitoba The handbook compares being drowsy or “half asleep” to a drugged condition.
    Other provinces Check your provincial handbook. Do not drive when tired.

    For alcohol, drugs and roadside suspensions, see impaired driving in Canada for new drivers.

    Who is most at risk, and when?

    • Time of day: Ontario says drowsiness crashes tend to happen late at night and early morning (2 a.m. to 6 a.m.) and in the late afternoon (2 p.m. to 4 p.m.).
    • Shift workers: Ontario lists shift workers, people with undiagnosed or untreated sleep disorders, and commercial drivers as higher risk. If you think you may have a sleep problem, ask your doctor.
    • Long, steady drives: Saskatchewan warns the chance of falling asleep is high on long straight roads; Manitoba says drowsiness usually comes from steady driving or starting out tired.
    • New drivers: driving still takes a lot of concentration when you are learning, and several provinces restrict late-night driving for new drivers. Compare those rules in Canadian graduated licensing compared.

    What makes fatigue worse

    The NWT manual lists causes: lack of sleep, emotional stress, boredom, long periods of driving, physical activity, sickness and eye strain. It adds that overeating, alcohol or drugs, warm sunshine, a warm car and carbon monoxide from a leaky exhaust can all increase the effect. Have your exhaust checked whenever the car is serviced.

    What actually helps

    • Start rested. Every handbook puts this first.
    • Take breaks. The NWT manual says stop and walk around your vehicle at least once every two hours.
    • Share the driving. Saskatchewan: change drivers when you start to feel tired.
    • Nap somewhere safe. Ontario: park in a safe, secure place such as a well-lit rest stop or truck stop, lock the doors, close the windows and sleep.
    • If you must stop by the road: Manitoba says pull well over and turn on your four-way flashers so you are not hit.
    • Keep the car comfortable and ventilated, keep your eyes moving, and wear sunglasses on bright days (NWT).
    • No cruise control when overtired (Nova Scotia).

    What does not work

    Ontario is clear that stimulants are never a substitute for sleep. Caffeine helps briefly, but if you are short of sleep the effect wears off quickly. Turning up the radio or opening a window does not work either. Saskatchewan’s handbook makes the same point about caffeine: the effect can wear off suddenly, and the only remedy for fatigue is to pull off the road and sleep. Rumble strips on some Saskatchewan highways can alert you that you have drifted, but by then you are already too tired to be driving.

    A quick plan for a long trip

    1. Sleep properly the night before. Avoid starting a long drive after a night shift.
    2. Plan stops every two hours or so, and pick rest areas in advance.
    3. Travel with another fully licensed driver if your licence rules allow it, and swap regularly.
    4. Avoid the 2 a.m. to 6 a.m. window if you can.
    5. At the first warning sign, stop. Do not try to push on to the next town.

    Night driving brings its own risks: see night driving in Canada. For the full licensing path, start with learning to drive in Canada.

    Sources

    • Government of Ontario, “The Official MTO Driver’s Handbook: Dealing with particular situations” (ontario.ca)
    • Government of Alberta, “Preventing impaired driving” (alberta.ca)
    • Government of the Northwest Territories, “NWT Driver’s Manual: Basic” (idmv.inf.gov.nt.ca)
    • SGI, “Saskatchewan Driver’s Handbook” (sgi.sk.ca)
    • Manitoba Public Insurance, “Manitoba Driver’s Handbook: Drowsiness or Fatigue” (apps.mpi.mb.ca)
    • Government of Nova Scotia, “Driver’s Handbook” (novascotia.ca)
  • When to Use High Beams in Canada: Night Driving and Glare

    When to Use High Beams in Canada: Night Driving and Glare

    Photo: Jaykumar Bherwani, Pexels

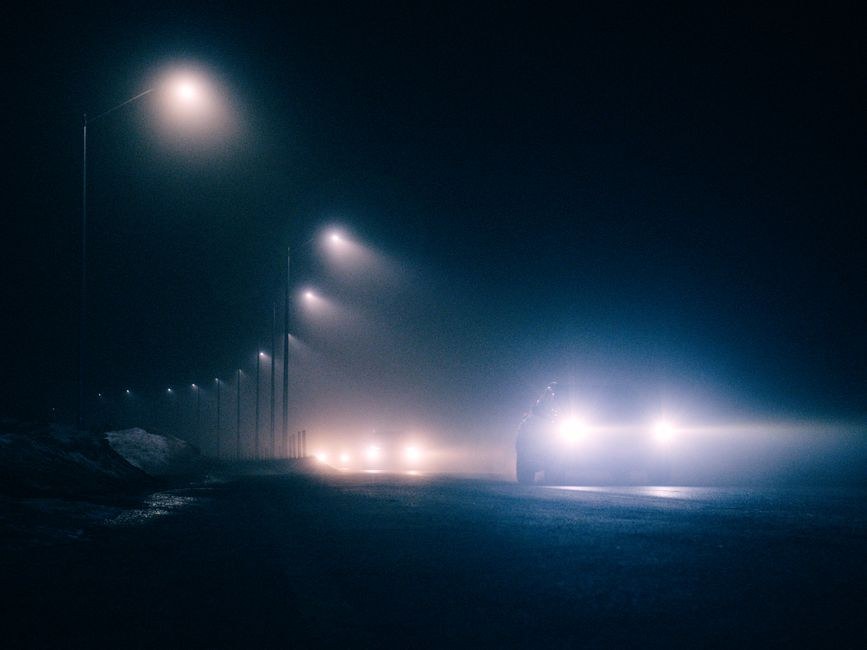
    When to use high beams in Canada: on dark roads with no one close by, then dip to low beams when another vehicle comes within the distance your province sets. In Ontario that is 150 metres for oncoming traffic and 60 metres when you are following. Alberta and the Northwest Territories set 300 metres oncoming and 150 metres following. The distances differ more than most learners expect, so check the table below for your province.

    High-beam dipping distances by province

    Province or territory Dip for oncoming vehicles within Dip when following within Source
    Ontario 150 m 60 m MTO handbook
    British Columbia 150 m 150 m ICBC Learn to Drive Smart
    Alberta 300 m 150 m Use of Highway and Rules of the Road Regulation, s. 56
    Saskatchewan at least 200 m in advance 100 m (also when being passed) SGI handbook
    Manitoba at least 450 m 60 m MPI handbook
    Northwest Territories 300 m 150 m NWT Driver’s Manual
    Nova Scotia 150 m 60 m Using the Road Regulations, s. 76 (on a divided highway you only need to dip for oncoming traffic if your lights could affect the other driver)
    Prince Edward Island 150 m 60 m PEI Driver’s Handbook

    Quebec, New Brunswick, Newfoundland and Labrador, Yukon and Nunavut: check your provincial handbook for the exact figures.

    A few extra rules from the handbooks:

    • Ontario: the rules apply on all roads, including divided ones. On country roads, switch to low beams at curves and hilltops so you can see oncoming lights and will not dazzle anyone.
    • Saskatchewan: you do not need to dip for oncoming traffic on a divided highway where the roadways are 22 metres or more apart. Turn off spotlamps within 500 metres of oncoming traffic.
    • NWT: use low beams for oncoming traffic even on divided highways.
    • PEI: use low beams in city driving except on unlit streets where traffic allows. Do not wait for the other driver to dip first.

    When headlights must be on

    Province or territory Headlights required
    Ontario From half an hour before sunset to half an hour after sunrise (as the handbook words it), and when you cannot clearly see people or vehicles within 150 m
    British Columbia From 30 minutes after sunset to 30 minutes before sunrise, and when visibility is under 150 m
    Alberta and NWT “Night time” is defined as one hour after sunset to one hour before sunrise; also when you cannot see clearly 150 m ahead
    Saskatchewan Half an hour after sunset to half an hour before sunrise, and whenever visibility is poor
    Manitoba Half an hour before sunset to half an hour after sunrise (handbook), and when visibility drops to 60 m
    Nova Scotia At night, and any time fog, rain, snow or poor light limits visibility (Using the Road Regulations, s. 72, in force 19 October 2026)
    PEI Sunset to sunrise, and when visibility is poor

    The simple habit that covers every province: if it is getting dark or visibility is poor, headlights on.

    Daytime running lights are not headlights

    Many learners assume their car is lit because the dashboard is lit or the daytime running lights (DRLs) are on. Often the tail lights are off.

    • Ontario: DRLs must not be used as headlights in poor light. They do not turn on other required lights such as tail lights. Use the automatic setting if your car has it.
    • British Columbia: it is illegal to drive at night with parking lights or DRLs instead of headlights.
    • NWT: DRLs are only at the front; the tail lights and dash lights will not be on.
    • Saskatchewan and Nova Scotia: both warn the same and tell you to switch headlights on at night.
    • PEI: parking lights are for parking only.

    What does overdriving your headlights mean?

    You are overdriving your headlights when you are going so fast that your stopping distance is longer than the distance your lights show you. If something appears at the edge of the beam, you cannot stop in time.

    Handbook Low beams light about High beams light about
    British Columbia 30 m 100 m
    Manitoba 30 m 110 m

    How to avoid it:

    • Slow down at night, especially on unlit roads (Ontario).
    • Be careful on curves: BC says overdriving is especially dangerous there.
    • Do not be fooled by reflective signs. Ontario warns they can make you think you can see further than you really can.
    • Saskatchewan suggests you should be able to see about 12 seconds ahead at night, which means using high beams most of the time on open roads and looking beyond the lit area.

    Watch for wildlife at the edges of the beam on rural roads: see moose, deer and caribou.

    Glare from oncoming lights and low sun

    At night

    • Do not look at oncoming headlights. Ontario says look up, beyond and slightly to the right of them; NWT, Manitoba and PEI say look toward the right edge of the road.
    • If the other driver does not dip, keep yours on low beam anyway (Nova Scotia).
    • For glare from behind, adjust your mirror or flip a day-night mirror to “night” (Manitoba, Saskatchewan).
    • Saskatchewan says it can take up to five seconds to recover from glare, and up to 25 seconds as people age. If you think you have a problem, see an optometrist or ophthalmologist.
    • Keep the inside of the windshield and your headlights clean. Keep interior lights off so your eyes stay adapted (Manitoba).

    In daytime

    • Use your sun visor and keep good sunglasses in the car (Ontario, Nova Scotia).
    • Entering a tunnel or underground garage on a bright day: slow down, remove sunglasses and turn on your headlights.
    • Nova Scotia: if glare is so bad you cannot see, stop on the roadside well away from traffic until you can drive safely.

    Night driving and new driver rules

    Several provinces limit when new drivers can drive at night or who can ride with them. Those curfews are compared in Canadian graduated licensing compared. Night driving also makes tiredness more likely; see drowsy driving in Canada. For fog and rain, which cause the same visibility problems, see driving in rain, fog and floods. If your headlights fail while driving, see car emergencies in Canada. The full licensing path is in learning to drive in Canada.

    Sources

    • Government of Ontario, “The Official MTO Driver’s Handbook: Getting ready to drive” (ontario.ca)
    • Government of Ontario, “The Official MTO Driver’s Handbook: Driving at night and in bad weather” (ontario.ca)
    • ICBC, “Learn to Drive Smart” (icbc.com)
    • Alberta King’s Printer, “Use of Highway and Rules of the Road Regulation, AR 304/2002” (kings-printer.alberta.ca)
    • SGI, “Saskatchewan Driver’s Handbook” (sgi.sk.ca)
    • Manitoba Public Insurance, “Manitoba Driver’s Handbook: Night Driving, Reduced Visibility” (apps.mpi.mb.ca)
    • Government of the Northwest Territories, “NWT Driver’s Manual: Basic” (idmv.inf.gov.nt.ca)
    • Government of Nova Scotia, “Driver’s Handbook” (novascotia.ca)
    • Government of Prince Edward Island, “Driver’s Handbook” (princeedwardisland.ca)
    • Government of Nova Scotia, “Using the Road Regulations” under the Traffic Safety Act, in force 19 October 2026, sections 2, 72 and 76 (novascotia.ca)
  • Driving in Fog, Rain and Floods in Canada: Hydroplaning Tips

    Driving in Fog, Rain and Floods in Canada: Hydroplaning Tips

    Photo: P199, CC BY-SA 4.0, via Wikimedia Commons

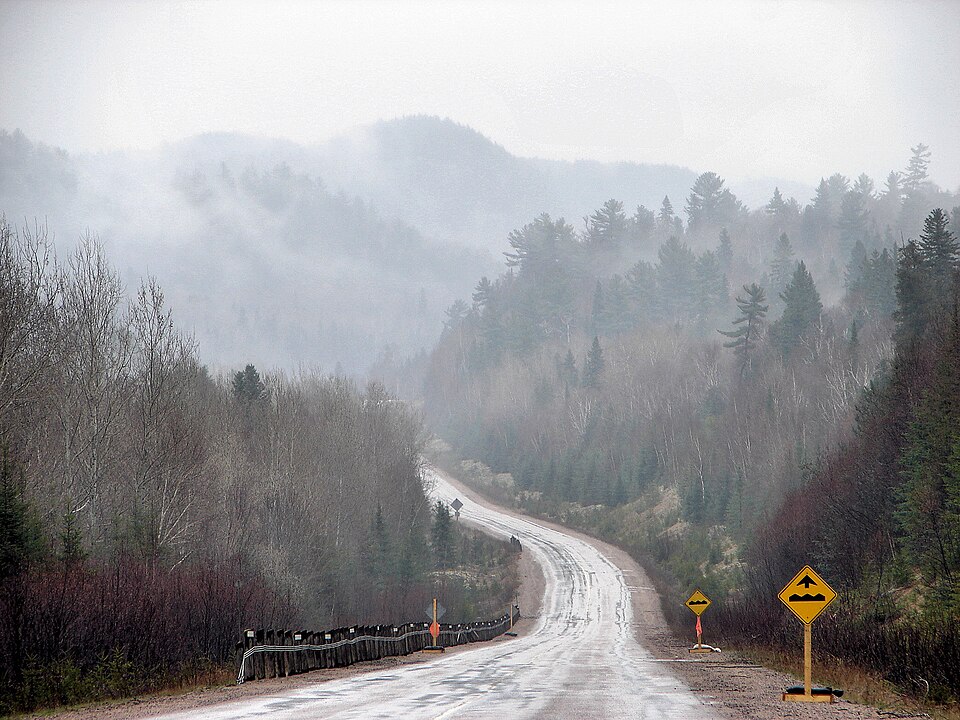
    Driving in fog in Canada: slow down gradually, use your low-beam headlights (plus fog lights if you have them), leave a bigger gap and use the right edge of the road as your guide. If the fog gets too thick, pull completely off the road into a safe parking area and turn on your hazard lights. Never stop in a travel lane. That is the advice in Ontario’s MTO handbook, and the other provincial handbooks say much the same.

    This guide covers fog, rain, hydroplaning and flooded roads. Snow, ice and whiteouts are in our winter driving guide.

    Driving in fog: do and don’t

    Ontario’s first advice is to avoid driving in fog: check the forecast and delay your trip if there is a fog warning. If you are caught in it:

    Do

    • Slow down gradually to a speed that suits the conditions.
    • Turn on your full lighting system and use low beams. High beams reflect off the water droplets and make it harder to see.
    • Use fog lights if your car has them, in addition to low beams.
    • Increase your following distance and avoid passing, changing lanes or crossing traffic.
    • Follow the right edge of the road rather than the centre line.
    • Cut distractions, keep windows and mirrors clear, and use the defroster and wipers.

    Don’t

    • Stop on the travelled part of the road. Ontario warns you could become the first link in a chain-reaction collision.
    • Speed up suddenly when the fog seems to clear. You may drive straight back into it.
    • Speed up to pass a slow vehicle or to get away from a tailgater.

    When to pull off

    If visibility is dropping fast or the fog is too dense to continue, Ontario says pull completely off the road into a safe parking area, keep your low beams on and add your hazard lights. Other handbooks add:

    • Saskatchewan: if you have slowed down and still cannot see 12 seconds ahead, get off the road as soon as you safely can.
    • Nova Scotia: pull as far off as possible, secure the vehicle, turn on the flashers, leave from the passenger side and stay away from the road.
    • Manitoba: if you are driving well below the speed limit, turn on your hazard lights so others know you are slow.

    When must headlights be on in poor visibility?

    Most provinces set a visibility distance below which headlights are required, not just at night.

    Province or territory Headlights required when you cannot see clearly
    Ontario People or vehicles less than 150 metres away
    British Columbia Visibility under 150 metres
    Alberta Objects not clearly visible 150 metres ahead
    Northwest Territories Cannot see clearly 150 metres in front
    Nova Scotia No set distance: low beams and tail lights any time fog, rain, snow or poor light limits visibility (Using the Road Regulations, s. 72, in force 19 October 2026)
    Manitoba Visibility reduced to 60 metres (handbook)

    Daytime running lights are not enough in fog. Ontario says they must not be used as headlights in poor light, and on many cars they do not switch on the tail lights. For other provinces, check your provincial handbook.

    Driving in rain

    The first few minutes of rain are the most dangerous. PEI’s handbook explains why: the first drops loosen oil and dirt on the road and create a slippery film. Saskatchewan says roads are most slippery in the first 10 minutes of a storm; Nova Scotia says the first 10 to 15 minutes, especially after a dry spell.

    • Slow down and drive so you can stop within the distance you can see (Ontario).
    • Leave more space. Nova Scotia recommends four or more seconds of following distance in rain. More space also keeps you out of the spray from the vehicle ahead.
    • Make only small, gentle movements with the brake, gas and steering (Saskatchewan).
    • Use low beams and make sure your wiper blades clear the glass without streaking. Replace them if they do not.
    • Avoid puddles: Ontario notes they can hide potholes, drench pedestrians, stall the engine and make your brakes less effective.

    In Quebec, the government’s speed limit guidance says to slow down whenever visibility is reduced by darkness, fog, rain or snow, and SAAQ’s driving course material recommends low beams when rain or fog reduces visibility. Check the SAAQ guide for its full “special conditions” chapter.

    What is hydroplaning and what do you do?

    Hydroplaning (also called aquaplaning) happens when your tires ride up on a film of water and lose contact with the road. You lose the ability to brake, accelerate or steer properly.

    Handbook Partial hydroplaning starts at about Tires may be fully on the water at about
    Prince Edward Island 60 km/h 90 km/h
    Nova Scotia 55 km/h 85 km/h

    PEI adds that when the water is deeper than your tread, complete hydroplaning can be expected at 80 to 90 km/h.

    If you hydroplane

    1. Take your foot off the accelerator and let the car slow down (PEI). PEI warns that even a slight turn or a gust of wind can start an uncontrollable skid.
    2. Keep the wheel steady. If you are only partly hydroplaning, you should be able to correct a skid as normal.
    3. If you are fully hydroplaning, PEI says all you can do is release the accelerator and ride it out until the tires grip again.

    How to prevent it

    • Good tires with deep tread let water escape from under the tire (Ontario, PEI).
    • Slow down when roads are wet (Nova Scotia, Ontario).
    • Keep tires properly inflated. Nova Scotia lists improper tire pressure as a factor.

    Flooded roads and washouts

    Ontario’s advice is simple: avoid driving on flooded roads, because water may stop your brakes from working. Water depth is hard to judge, so do not rely on a number you have heard elsewhere. The safest choice is the one Ontario gives: find another route.

    If you had to drive through water

    • Ontario: test your brakes afterwards when safe by stopping quickly and firmly at 50 km/h. The car should stop straight and the pedal should feel firm, not spongy. If it still pulls or feels spongy once dry, get it repaired immediately.
    • Manitoba: test the brakes lightly after deep water. Dry them by driving slowly and applying them lightly.
    • Nova Scotia: if the brakes are not responding normally in rain, press the brake gently with your left foot while keeping light pressure on the gas with your right, until they work normally.

    If a vehicle ends up in water, Manitoba’s handbook says occupants have only about one minute to get out: undo seatbelts, open or break a window and get out straight away, sending children first.

    Province-by-province: where to read more

    • Ontario: MTO handbook, “Driving at night and in bad weather”.
    • Quebec: SAAQ driver’s guide, special conditions section.
    • Nova Scotia: Driver’s Handbook chapter 5, “Adverse Driving Conditions”.
    • PEI: Driver’s Handbook chapter 4, “Highway, Weather and Visibility Conditions”.
    • Manitoba: see our Manitoba poor driving conditions guide.
    • Everywhere else: check your provincial handbook for its weather chapter.

    For what to do if your car skids or breaks down in bad weather, see car emergencies in Canada. For night glare and high beams, see night driving in Canada. For the full licensing path, start with learning to drive in Canada.

    Sources

    • Government of Ontario, “The Official MTO Driver’s Handbook: Driving at night and in bad weather” (ontario.ca)
    • Government of Ontario, “The Official MTO Driver’s Handbook: Getting ready to drive” (ontario.ca)
    • Government of Prince Edward Island, “Driver’s Handbook” (princeedwardisland.ca)
    • Government of Nova Scotia, “Driver’s Handbook” (novascotia.ca)
    • SGI, “Saskatchewan Driver’s Handbook” (sgi.sk.ca)
    • Manitoba Public Insurance, “Manitoba Driver’s Handbook: Reduced Visibility, Wet Brakes, Vehicle Plunging into Water” (apps.mpi.mb.ca)
    • ICBC, “Learn to Drive Smart” (icbc.com)
    • Alberta King’s Printer, “Use of Highway and Rules of the Road Regulation, AR 304/2002” (kings-printer.alberta.ca)
    • Government of the Northwest Territories, “NWT Driver’s Manual: Basic” (idmv.inf.gov.nt.ca)
    • Gouvernement du Québec, “Speed limits” (quebec.ca)
    • SAAQ, “In-Car Session Workbook” (saaq.gouv.qc.ca)
    • Government of Nova Scotia, “Using the Road Regulations” under the Traffic Safety Act, in force 19 October 2026, sections 2, 72 and 76 (novascotia.ca)
  • What to Do If Your Brakes Fail: Car Emergencies in Canada

    What to Do If Your Brakes Fail: Car Emergencies in Canada

    Photo: Michael Gil, CC BY 2.0, via Wikimedia Commons

    If your brakes fail in Canada, the Ontario MTO handbook says to pump the brake pedal to try to restore pressure, then apply the parking brake gently but firmly while holding the release button. Saskatchewan’s SGI handbook says the opposite about pumping: on a modern dual-circuit system, do not pump, push the pedal much harder, use the parking brake without locking the rear wheels and shift to a lower gear. Every handbook agrees on the last step: once you are stopped, do not drive on. Call for help.

    That split is a good reminder that provincial handbooks do not always agree. This guide sets out what each one says for the common car emergencies, so you can learn your own province’s version for the knowledge test and know why the advice differs.

    What to do if your brakes fail

    Total brake failure is rare. The SGI and NWT manuals both explain that cars have a two-circuit (dual-circuit) hydraulic system, so if one half fails the other still gives some stopping power. You will usually see the brake warning light and feel that you need to push much harder.

    Handbook Main advice
    Ontario (MTO) Pump the pedal to try to restore hydraulic pressure. If that fails, apply the parking brake gently but firmly while holding the release button. Practise a parking-brake emergency stop with a qualified instructor.
    Saskatchewan (SGI) Even if the pedal goes to the floor, keep pressing: it still has stopping power. Do not pump. Use the parking brake, adjusting the release so the rear wheels do not lock. If the car pulls to one side, grip the wheel, counter-steer and shift to a lower gear.
    Northwest Territories When the brake warning light comes on, pull over as soon as it is safe. For total failure, follow your owner’s manual on downshifting and using the parking brake. If power assistance fails, press harder with steady pressure.

    Whatever your handbook says, two points are shared: get the car stopped off the road, and do not drive it again until a qualified technician has checked the brakes.

    Threshold braking vs ABS braking

    Threshold braking means braking as hard as you can without locking the wheels, so you can still steer. It is mainly a technique for cars without anti-lock brakes (ABS).

    Without ABS

    • Ontario: brake as hard as you can until a wheel starts to lock, ease off slightly to release it, then press again. Do not pump. Keep going until you reach the speed you want.
    • Saskatchewan: the SGI handbook adds shifting to neutral (or pressing the clutch) first, then tracking the point just before lock-up until you stop. It warns the technique is almost impossible if you panic, and describes four-wheel lock braking as the fallback.
    • Manitoba: steady pressure without locking the wheels.
    • NWT: steady, hard pressure short of locking, easing off if the wheels lock.

    With ABS

    • Ontario: press the pedal hard and let the system control wheel lock-up. Expect pulsing in the pedal and do not release it. ABS is there to help you keep steering, so don’t count on it to stop you sooner; that depends on the car and the surface.
    • NWT: apply steady hard pressure; do not pump.
    • Saskatchewan: with ABS, brake hard and steer where you want to go.
    • Manitoba: check your owner’s manual, as the amount of steering control varies by system.

    Not sure if your car has ABS? Look for the ABS light on the dashboard when you start the car, or check the owner’s manual. See our car controls guide for the warning lights.

    If the accelerator sticks

    1. Ontario: try to lift the pedal by slipping your foot under it. Never reach down with your hands while moving.
    2. Turn on your hazard lights and shift to neutral (Ontario) or neutral / press the clutch (Saskatchewan).
    3. Slow down and stop as soon as it is safe, preferably off the road.
    4. Turn off the ignition. SGI says you can then try to free the pedal with your feet. Ontario says not to drive away and to call for help.

    If a tire blows out

    A blow-out causes strong steering pull and vibration. The handbooks agree on the core steps:

    • Hold the wheel firmly and keep looking and steering where you want to go.
    • Take your foot off the gas and let the car slow down. NWT: resist the urge to brake straight away. Manitoba: brake only once speed has dropped enough to keep control.
    • SGI adds that gentle braking improves stability, and that a rear blow-out can make the back fishtail: do not over-correct.
    • Manitoba: if the blow-out pushes you onto the shoulder, do not try to get back onto the pavement; let the car coast to a stop.
    • Stop well off the road and turn on your hazard lights before changing the tire.

    If your headlights fail at night

    • Check the headlight switch (Ontario, NWT) and the dimmer switch (SGI).
    • If they stay out, turn on your hazard lights (SGI also mentions parking lights).
    • Slow down while holding your course, then pull off the road in a safe place and call for help. Ontario reminds you it is illegal to drive at night without lights.

    If your wheels go off the pavement

    This is where learners most often make things worse by jerking the wheel. The handbooks agree: do less, not more.

    1. Grip the wheel firmly and do not panic.
    2. Take your foot off the gas. Avoid heavy braking; if you must brake, do it gently (NWT, Manitoba).
    3. Steer straight along the shoulder while you slow down. Do not try to get straight back on.
    4. When you are slow, in control and the road is clear, steer back on. SGI describes turning the wheel left and almost immediately counter-steering as the front wheel comes onto the road, then straightening. Ontario says be ready to correct your steering once all wheels are back on.
    5. Manitoba warns not to overshoot the centre line as you return.

    SGI adds one exception: if you leave the road at a critical spot, such as just before a bridge, treat the return like an emergency lane change: steer, counter-steer, straighten.

    Going into a ditch

    The SGI handbook is the only one with a ditch section. Its advice: do not brake hard, do not turn the wheel sharply and do not try to climb back onto the road, because those actions cause rollovers. Instead, drive down the ditch, steering gently down the slope, staying off the brake and easing off the gas. It says the main cause of rollovers is trying to return to the road too early, and a tow is a small price compared with rolling the car.

    If you break down on a highway

    Here the handbooks give genuinely different advice on staying in the car.

    Handbook What it says
    Ontario Begin pulling over at the first sign of trouble; never stop in a driving lane. Hazard lights on, foot off the gas, onto the nearest shoulder. Leave by the door away from traffic if possible. Do not raise the hood. Wait in the vehicle with the doors locked; ask anyone who stops to call police or an automobile club.
    Northwest Territories Move off the road and try to reach the nearest exit. Do not stop on a bridge or in a tunnel. Hazard lights on and raise the hood. Have everyone leave the vehicle and wait at a safe location. No roadside repairs on busy or fast roads. Never get into a stranger’s vehicle.
    Manitoba Park all four wheels off the travelled road if you can. Use your four-way flashers as you stop. Place reflective signs or flares 60 metres in front and behind. If you cannot move the car off the road, raise the hood to warn others.
    Saskatchewan Pull onto the shoulder at the first sign of trouble, hazards on, never stop on the travelled part. Stay with the car if possible; flashers or a raised hood signal for help. Exit away from traffic (Saskatchewan Driver’s Handbook, s. 6.3).
    Alberta The Alberta Driver’s Guide has its own breakdown section. Check the current edition for its exact steps.

    The difference makes sense: on a patrolled freeway with traffic passing close by, Ontario prefers you stay belted in a locked car; the NWT manual has occupants wait at a safe spot away from the vehicle. Follow your own province’s handbook for the test, and use judgment on the day. In winter, staying with the vehicle for warmth matters: see winter driving in Canada.

    Quick comparison: who says what

    Emergency Ontario Saskatchewan NWT
    Brake failure Pump, then parking brake Do not pump; push harder, parking brake, lower gear Pull over; owner’s manual for downshift and parking brake
    Stuck accelerator Foot under pedal, hazards, neutral, stop, ignition off Neutral, pull over, key off, free pedal with feet Check the NWT manual
    Blow-out Off the gas, steer firmly, stop off road Off the gas, gentle braking, steer where you want to go Do not brake at once; off the gas, then gentle steady braking
    Off the pavement Off the gas, avoid heavy braking, steer back when in control Steer along shoulder, slow, steer and counter-steer back Do not steer straight back; check traffic, return and straighten
    Breakdown Stay in car, doors locked, hood down Pull onto the shoulder at the first sign of trouble, hazards on, never stop on the travelled part. Stay with the car if possible; flashers or raised hood to signal for help; exit away from traffic Hood up, occupants wait at a safe spot

    BC, Manitoba and other provinces

    • British Columbia: ICBC’s chapter on emergency strategies is covered in emergency strategies for BC drivers.
    • Manitoba: the MPI handbook covers blow-outs, running off the pavement, emergency braking and disabled vehicles as summarized above.
    • Quebec, the Atlantic provinces, Yukon and Nunavut: check your provincial handbook. The principles above (stay calm, ease off the gas, steer smoothly, stop well off the road) are common to the provincial handbooks.

    Practise before you need it

    Ontario suggests new drivers practise a parking-brake emergency stop and ABS emergency braking with a qualified driving instructor under controlled conditions. That is safer than finding out how your car reacts on a highway. After any emergency involving a collision, see collision reporting rules by province, and for the full licensing path start at learning to drive in Canada.

    Sources

    • Government of Ontario, “The Official MTO Driver’s Handbook: Dealing with emergencies” (ontario.ca)
    • Government of Ontario, “The Official MTO Driver’s Handbook: Driving at night and in bad weather” (ontario.ca)
    • SGI, “Saskatchewan Driver’s Handbook” (sgi.sk.ca)
    • Government of the Northwest Territories, “NWT Driver’s Manual: Basic” (idmv.inf.gov.nt.ca)
    • Manitoba Public Insurance, “Manitoba Driver’s Handbook: Blowouts, Running off the Pavement, Emergency Braking, Disabled Vehicle” (apps.mpi.mb.ca)
    • Government of Alberta, “Driver guides” (alberta.ca)
    • National Highway Traffic Safety Administration, “Light Vehicle Antilock Brake System Research Program, Task 4” (nhtsa.gov)
  • ADHD, Autism, Anxiety and Mental Health: Canada Licence Rules

    ADHD, Autism, Anxiety and Mental Health: Canada Licence Rules

    Photo: Derek Hatfield, CC BY 2.0, via Wikimedia Commons

    Having ADHD, autism, anxiety, depression or another mental health condition does not by itself stop you getting a driver’s licence in Canada. Under the national CCMTA standard, as published by RoadSafetyBC, you may be eligible if your condition is stable, you have enough insight to stop driving if it becomes acute, and your driving abilities are not impaired. Declare the condition if your application asks, and the licensing office decides case by case.

    This page explains licensing rules only. Your doctor, psychiatrist or care team is the right person to advise on your treatment and whether you are ready to drive.

    The general standard for psychiatric conditions

    • Eligible if: the condition is stable, you have sufficient insight to stop driving if it becomes acute, and your driving abilities are not impaired.
    • Returning to driving: if you stopped because of a psychiatric condition, you need your treating physician’s support to start again.
    • Stop and report: BC says a licence holder must stop driving and report to RoadSafetyBC if hospitalized for a mental health issue, or if their mental health deteriorates or relapses.
    • Reassessment: set case by case. After a psychotic episode, RoadSafetyBC may reassess every year until the physician reports no further episodes.

    Condition by condition

    Condition What the standard notes What it usually means for a learner
    ADHD A small body of research links ADHD to higher crash risk. Stimulant medication may improve driving performance, though evidence is mostly from simulators and small studies Assessed under the general standard: stable, insight, driving not impaired
    Autism See the general standard in the RoadSafetyBC psychiatric chapter Ask your licensing office whether it needs any information; the general functional test applies
    Anxiety Research is very limited. Sedatives and sleeping medicines can impair driving Medication effects are often the bigger licensing question
    Depression Mixed research. Treatment may improve alertness, but some antidepressant side effects can affect thinking and reactions General standard applies
    Bipolar disorder Grouped with mood disorders Stability and insight are central
    Psychotic disorders A specialist’s report supporting a return to driving may be needed after an episode Possible yearly reassessment

    Medication and driving

    Psychotropic medicines can affect driving through drowsiness, slower reactions and effects on thinking. The national standard on drugs says using a psychotropic medicine does not by itself make you ineligible, but a driver cannot compensate for its effects. Ask your doctor or pharmacist how your medicine affects you, especially when you start it or change the dose. The drug rules for novices are in Medical cannabis and new drivers in Canada.

    Will my doctor report me?

    Only if they believe your condition makes driving dangerous, and the duty differs by province. In Ontario, acute psychosis or suicidal plans involving a vehicle are among the high-risk conditions that can lead to suspension. In BC, a report is mandatory only if a patient keeps driving after being warned. See Does your doctor have to report you?

    Help with the knowledge test

    If reading, focus or test anxiety is the bigger hurdle, most provinces offer oral tests, extra time or other accommodations. These are covered in Drivers with disabilities: learning to drive, test accommodations and adapted vehicles in Canada.

    Practical tips for practice drives

    • Start with short, quiet routes and build up, and agree hand signals or words with your supervisor for “I need to stop”.
    • If you feel overwhelmed while driving, pull over safely. Stopping is always allowed.

    Related: RoadSafetyBC medical fitness. Back to the hub: Driving with a medical condition or disability in Canada.

    Sources

    • Government of British Columbia, “Chapter 14: Psychiatric disorders”, RoadSafetyBC medical standards (gov.bc.ca)
    • Government of British Columbia, “Chapter 15: Drugs, alcohol and driving”, RoadSafetyBC medical standards (gov.bc.ca)
    • Government of Ontario, “Reporting a driver for medical review” (ontario.ca)
    • Government of British Columbia, Motor Vehicle Act, section 230 (bclaws.gov.bc.ca)
  • Accessible Parking Permits in Canada: How to Apply by Province

    Accessible Parking Permits in Canada: How to Apply by Province

    Photo: Jerry "Woody", CC BY-SA 2.0, via Wikimedia Commons

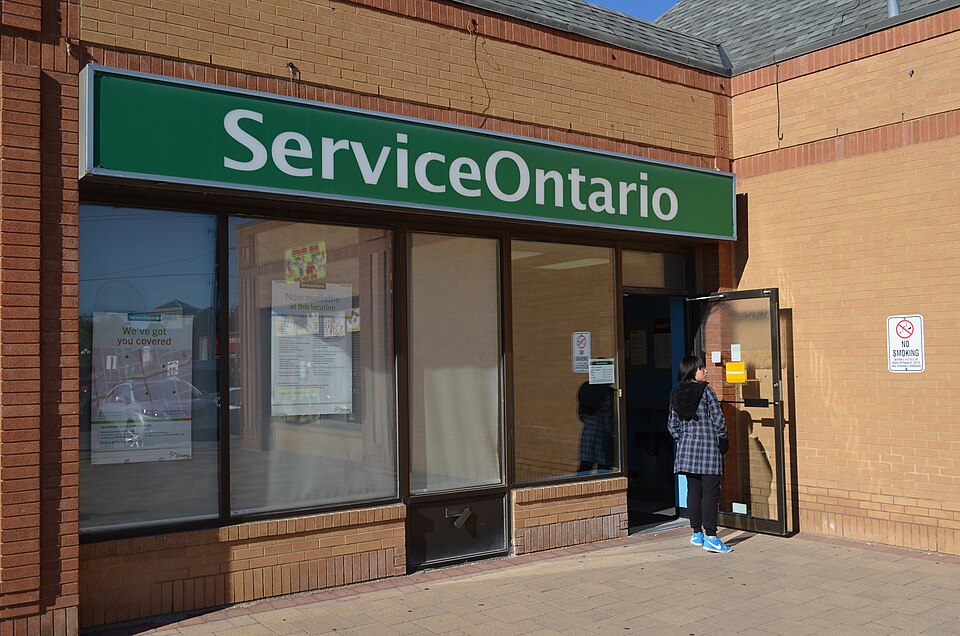
    Accessible parking permits in Canada are issued province by province, not nationally. In Ontario you apply to ServiceOntario and the permit is free. In Alberta you take an approved form to a registry agent. In British Columbia the permit is run by SPARC BC, a non-profit. In every case a health professional must certify that your condition limits your mobility, and the permit belongs to you, not to a car, so it can be used in a learner’s car when you are the driver or passenger.

    Ontario, Alberta and BC compared

    Ontario Alberta British Columbia
    Issued by ServiceOntario Registry agents SPARC BC (Social Planning and Research Council of B.C.)
    Who certifies Physicians, nurse practitioners, occupational therapists, physiotherapists, chiropractors, chiropodists and podiatrists Physicians, nurse practitioners, occupational therapists, physiotherapists, podiatrists, chiropractors Per the SPARC BC application form
    Long-term permit Permanent or “subject to change”: 5 years Long-term: 5 years. Permanent: renewed every 5 years without new medical certification Permanent: 3 years, renewable
    Temporary permit Up to 12 months 3 to 12 months 1 to 12 months, not renewable (apply again)
    Fee Free to get, renew or replace Ask your registry agent Check with SPARC BC when applying

    In Prince Edward Island, accessible spaces are marked by an approved sign or blue paint, and no one may stop, stand or park in one unless the vehicle shows a valid accessible parking permit or plate.

    Who qualifies?

    Ontario

    A regulated health practitioner must certify a condition that limits your mobility. Examples include needing a brace, cane, crutch or wheelchair, needing help to walk, severe lung disease, needing portable oxygen, certain heart conditions, severely limited walking because of arthritic, neurological, musculoskeletal or orthopaedic conditions, and serious vision impairment.

    Alberta

    You may qualify if you cannot walk more than 50 metres (164 feet), or have a loss of vision that substantially limits safe and independent mobility in parking areas.

    British Columbia

    SPARC BC lists mobility limitations such as needing extra width to get in and out of a vehicle in a wheelchair, using a cane or other mobility aid, or being unable to walk far because of a health condition. You do not need to own a car.

    How to apply

    Ontario

    1. Get the form from a ServiceOntario centre or online.
    2. Complete Part A yourself; a regulated health practitioner completes Part B.
    3. Submit with ID showing your full name, date of birth and signature, online, by mail or in person.

    Ontario says online and mail applications take up to 3 weeks.

    Alberta

    1. Complete the parking placard application (REG3164).
    2. Have an authorized health care provider approve it.
    3. Take it to a registry agent with ID within 6 months of the provider signing it.

    British Columbia

    Download the application from SPARC BC or apply through its website. Motorcycle users and organizations apply by phone.

    Quebec and other provinces

    In Quebec, the parking sticker for persons with disabilities is issued by the SAAQ. Check eligibility, fee and validity with the SAAQ directly. Other provinces and territories run their own schemes through their licensing or municipal offices.

    Can a learner driver use the permit?

    Yes, if the permit holder is in the car. In Ontario the permit is issued to a person, not a vehicle, and the named holder must be the driver or a passenger going to or from the parking space. So a learner with a permit can display it in a practice car, and a parent with a permit can use it when they are a passenger supervising a lesson.

    What you cannot do is use it without the holder. Ontario prohibits parking in an accessible space while waiting to drop off or pick up the holder, and misuse can bring a fine of up to $5,000 and seizure of the permit.

    Travelling to another province

    Alberta accepts valid placards from other provinces, territories and countries, and can issue a temporary visitor placard if you forgot yours, to be returned before you leave. Ontario also issues a traveller’s permit, valid for 12 months or the remaining life of your permit, whichever is shorter.

    Related: Drivers with disabilities: learning to drive in Canada. Back to the hub: Driving with a medical condition or disability in Canada.

    Sources

    • Government of Ontario, “Get an accessible parking permit” (ontario.ca)
    • Government of Alberta, “Get a parking placard for people with disabilities” (alberta.ca)
    • SPARC BC, “Parking permits” (sparc.bc.ca)
    • Government of Prince Edward Island, “Highway Traffic Act” (princeedwardisland.ca)