Category: Canada

  • RoadSafetyBC Medical Fitness: DMERs and Reporting for New Drivers

    RoadSafetyBC Medical Fitness: DMERs and Reporting for New Drivers

    Photo: Gerdel, Public domain, via Wikimedia Commons

    In British Columbia, medical fitness to drive is decided by RoadSafetyBC, not ICBC. RoadSafetyBC uses the national CCMTA Medical Standards for Drivers, plus BC-specific guidelines. A new driver usually only hears from RoadSafetyBC if they disclose a condition when applying, or if someone reports a concern. RoadSafetyBC may then send a Driver’s Medical Examination Report (DMER) for your doctor or nurse practitioner to complete. A review does not automatically mean losing your licence: outcomes range from carrying on as normal to conditions on your licence.

    This page explains how the process works. Your doctor or nurse practitioner is the person to ask about your own condition.

    How RoadSafetyBC finds out about a condition

    • You tell them, for example when you answer the health questions for your learner (Class 7L) licence.
    • A health professional reports. Under Motor Vehicle Act s. 230, doctors, nurse practitioners, psychologists and optometrists must report a patient aged 16 or over who, in their opinion, has a condition that makes driving dangerous and who keeps driving after being warned. The legal detail is in does your doctor have to report you.
    • Someone else reports. Police, family members and ICBC can provide information, and anyone can report a concern using RoadSafetyBC’s online form.

    When you get a DMER

    RoadSafetyBC may ask for a DMER because of:

    • a known medical condition
    • a report that you have a condition affecting safe driving
    • your licence class (commercial drivers)
    • your age (80 or older)

    For a learner or new driver, the first two are the usual triggers.

    Completing the DMER: step by step

    1. Book your doctor or nurse practitioner. The exam covers cognition (memory, attention, judgment), eyesight and overall physical health. It is not a road test.
    2. Meet the deadline on the form. The report must be returned within the timeline printed on it. If you can’t, contact RoadSafetyBC straight away.
    3. Your practitioner faxes it. DMERs go by fax to 250-952-6888. Don’t send duplicate or emailed copies.
    4. Wait for the decision. An adjudicator reviews most files; nurse case managers handle complex ones.

    Cost (as of November 2026): the Medical Services Plan covers a DMER for a known or suspected condition up to $75. You pay any amount your practitioner charges above that. Lost your DMER? ICBC can give you a replacement at no charge.

    Other assessments you may be asked for

    Assessment What it is
    Enhanced Road Assessment A road-based assessment of how a condition affects your driving
    Occupational therapist assessment A functional driving assessment, often used for physical disabilities or vehicle adaptations
    Road test re-examination A road test ordered for medical reasons

    For learning to drive with a physical disability, including the Enhanced Road Assessment, see drivers with disabilities learning to drive in Canada.

    ICBC’s handbook says RoadSafetyBC calls almost 3,000 drivers a year in for a re-examination, usually after a medical report or a police report about a driving situation the driver handled poorly. A vision screening and signs test alone needs no appointment. If the notice includes a road test, call your local driver licensing office within 30 days of receiving it to book, and bring ID, your glasses or contacts and, ideally, a licensed driver in case you do not pass.

    Possible outcomes

    • You can continue driving.
    • You must report future changes in your condition.
    • Conditions or restrictions are placed on your licence.
    • You are found unfit to drive, or your licence is cancelled.

    RoadSafetyBC can add a restriction when a condition means you need a device or technology to drive safely. ICBC can add restrictions too, such as a corrective lenses restriction. If you move to BC with a medical restriction, the equivalent BC restriction is added. Removing a restriction usually means passing a road test; ask ICBC.

    Disagreeing with a decision

    • RoadSafetyBC has a process to review a driver medical fitness decision.
    • If you disagree with restriction 25, 26, 28 or 51, you can submit a Request for Reconsideration of the Application of Restriction. An adjudicator reviews it and replies in writing.

    What standards are used

    BC has adopted the CCMTA Medical Standards for Drivers (based on the March 2017 edition). No province is legally required to adopt them, but most do, so the core rules are similar across Canada. Condition guides: epilepsy, diabetes and insulin, vision.

    Contact RoadSafetyBC

    • Toll-free 1-855-387-7747 (Canada and US); 250-387-7747 in Greater Victoria or outside Canada and the US
    • Email [email protected] with your full name, licence number and phone number; replies can take up to seven business days

    Related guides

    Sources

    • Government of British Columbia, “Driver medical fitness” (gov.bc.ca)
    • Province of British Columbia, Motor Vehicle Act, section 230 (bclaws.gov.bc.ca)
    • Government of British Columbia, “Driver’s Medical Examination Report” (gov.bc.ca)
    • Government of British Columbia, “Driver medical fitness restrictions” (gov.bc.ca)
    • Government of British Columbia, “Driver medical fitness information for medical professionals” (gov.bc.ca)
    • Government of British Columbia, “CCMTA Medical Standards for Drivers: Chapter 1, Introduction”, RoadSafetyBC (gov.bc.ca)
  • Saskatchewan Traffic Lights: Left on Red, Arrows and Flashers

    Saskatchewan Traffic Lights: Left on Red, Arrows and Flashers

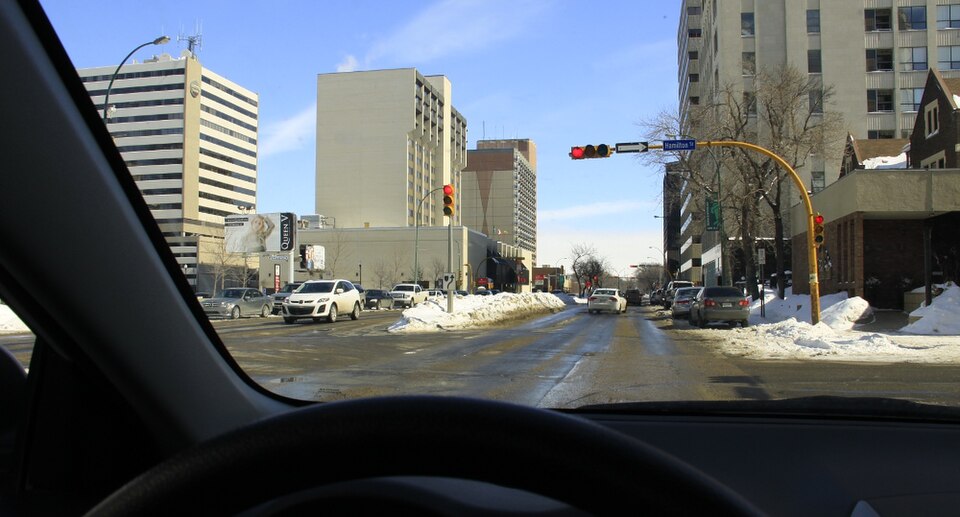
    Photo: waferboard, CC BY 2.0, via Wikimedia Commons

    Can you turn left on a red light in Saskatchewan? Only from a one-way street onto another one-way street, and only after a full stop and yielding to pedestrians and traffic. Right turns on red are allowed at most intersections after the same stop and yield. A sign can ban either turn, and a U-turn at any intersection with traffic lights is not allowed unless a sign permits it.

    Everything below comes from the Traffic signals section of SGI’s Saskatchewan Driver’s Handbook, with penalty points from SGI’s demerit tables. Signal questions show up on the SGI written test, and examiners watch your stops and turns on the SGI road test.

    Saskatchewan traffic lights at a glance

    You see What you do in Saskatchewan
    Steady green Go straight, turn left or turn right, unless a sign bans that movement, once the intersection is clear and it’s safe. Left turns yield to oncoming traffic and pedestrians.
    Steady amber Stop before the crosswalk. If you’re already in the intersection or can’t stop safely, proceed with caution. Yield to pedestrians in the crosswalk or pedestrian corridor.
    Steady red Stop and stay stopped until the light changes. Turns on red are allowed only as described below.
    Red with a solid green arrow Go only in the arrow’s direction, after yielding to other vehicles and pedestrians.
    Flashing green left arrow (with a red or green light) You may turn in the direction of the arrow.
    Amber arrow after a left arrow The arrow phase is ending: the green is about to come on for traffic in both directions.
    Flashing amber Proceed with caution.
    Flashing red Stop, then go when it’s safe.
    Alternating flashing amber lights A warning that the traffic lights ahead are red or about to turn red.

    Turning right on a red light in Saskatchewan

    A right turn on red is legal where no sign prohibits it. The order matters:

    1. Come to a complete stop at the correct stopping position.
    2. Yield to pedestrians crossing in front of you.
    3. Yield to every vehicle travelling through the intersection on the green.
    4. Turn only when there is a safe gap. If your view is blocked, wait for the green.

    A driver honking behind you does not change any of this. Turning on red is permitted, never required.

    Double right-turn lanes

    Where two lanes turn right, the driver in the outside (left) lane of the pair may also turn right on red after stopping and yielding to pedestrians and vehicles. SGI calls this an uncommon manoeuvre and asks for extra caution. Stay in your own lane through the turn and don’t follow the car beside you without checking the crosswalk yourself.

    Can you turn left on red in Saskatchewan?

    Yes, but only at the intersection of two one-way streets: you must be turning left from a one-way street onto another one-way street. The same rule applies as for a right turn on red: stop, yield to pedestrians and vehicles, then turn when safe.

    Turn on red Allowed in Saskatchewan?
    Right turn, single right lane Yes, after a full stop and yield, unless a sign prohibits it
    Right turn from the outside (left) lane of a double right-turn lane Yes, after a full stop and yield, with extra caution
    Left turn, one-way street onto one-way street Yes, after a full stop and yield, unless a sign prohibits it
    Left turn involving a two-way street Not covered by the exception: stay stopped until the light changes
    U-turn at any intersection with traffic lights No, unless a sign permits U-turns

    Look for a “no turn on red” sign every time. Some intersections have one, and it overrides the general rule.

    What to do at an amber light

    A steady amber means stop before you enter the crosswalk. The two exceptions are when you have already entered the intersection, or when you can’t stop safely; in either case, carry on with caution.

    You can usually see amber coming. SGI suggests noting how long the light has already been green and watching the pedestrian “don’t walk” signal, especially when it is flashing. A light that has been green for a while is a cue to ease off and be ready to stop, so you are not left choosing between braking hard and speeding up.

    Scenario: you’re already waiting to turn left

    You enter the intersection on a green to turn left, but oncoming traffic never leaves a gap. The light turns amber, then red. The handbook recognises that heavy traffic may force you to finish your left turn on amber or red. Before you go, check that oncoming cars are actually stopping and that no pedestrian is still in the crosswalk you are turning across. This only covers a driver who entered on the green; it is not permission to enter late.

    Green arrows and flashing green arrows

    • Solid green arrow with a red light: move only in the arrow’s direction, and only after yielding to other vehicles and pedestrians. If you want to go straight, the arrow does not apply to you; wait for a green light.
    • Flashing green left arrow: it can appear with a red or a green light, and it means you may turn left in that direction. Still check the crosswalk before you turn.
    • Amber arrow: after the left arrow, an amber arrow may show. It means the green light is about to appear for traffic in both directions, so the left-turn phase is ending. On the plain green that follows, a left turn has to yield to oncoming traffic and pedestrians again.

    Flashing amber, flashing red and advance warning flashers

    Flashing amber: proceed with caution. Slow enough to react to cross traffic and pedestrians.

    Flashing red: stop completely, then go only when it’s safe.

    Alternating flashing amber lights: these warn that the traffic lights ahead are red or about to turn red. They are a warning, not a signal at the intersection itself. Ease off early and look ahead to the actual light.

    Pedestrian signals and countdowns

    Under SGI’s rules, pedestrians may not start crossing when they face a red light, an amber light, or a “don’t walk” light or symbol. A flashing “don’t walk” means people who have already started should finish crossing. Some signals show a countdown of the seconds left before it is unsafe to cross.

    For drivers, that means:

    • A flashing “don’t walk” or low countdown is a strong hint that your green is about to end.
    • People may still be finishing their crossing when your light changes. Let them clear before you move or turn.
    • A countdown is not a timer to race.

    More on crosswalks, cyclists and other road users is in Sharing Saskatchewan Roads.

    Where to stop at a red light in Saskatchewan

    The road markings decide your stopping position:

    • At a clearly marked stop line, stop at the line.
    • At a crosswalk, marked or unmarked, stop at the nearest crosswalk.
    • Where a clearly marked X is painted, stop behind the X.
    • With no stop line, sidewalk or crosswalk: within 3 metres of the intersection in a town, city, village or hamlet, and within 10 metres in a rural area.

    The full table, with lanes, signalling distances and parking, is in the Saskatchewan rules of the road study guide.

    Demerit points for traffic light offences in Saskatchewan

    SGI’s demerit table assigns these points under the Driver Improvement Program and the Safe Driver Recognition program (section numbers refer to The Traffic Safety Act):

    Offence Points
    Failing to stop at a red light at an intersection 4
    Failing to stop at an intersection of two one-way streets 4
    Failing to obey a flashing red light (including stopping in the wrong place) 4
    Failing to stop at a crosswalk against an amber light 3
    Failing to yield to a pedestrian at a marked crosswalk showing only an amber light 3
    Right or left turn on red where a sign prohibits it 3
    Going in a direction not shown by a green arrow, or failing to yield on a red with a green arrow 3
    Failing to proceed cautiously at a flashing amber light 3
    U-turn at an intersection with a traffic light 1 under the Driver Improvement Program (the Safe Driver Recognition column is blank)

    The points above match SGI’s published demerit table; most rows carry the same points under both programs. The table shows no effective date and SGI can change it, so check SGI’s current schedule before relying on a figure. A blank column does not mean zero points.

    Check the current fine with SGI or the ticket itself. Points matter more for new drivers: see how they affect you in SGI’s GDL Improvement program and Safe Driver Recognition and Saskatchewan speeding, stunting and distracted driving penalties.

    Common questions

    Is turning right on red the same in Saskatchewan as in Quebec?

    No. Each province sets its own rule, and Montreal has its own exception. See right turn on red in Quebec. In Saskatchewan, follow the SGI rules above.

    Do roundabouts follow the same rules?

    Roundabouts and newer interchange designs have their own yield rules. See Saskatchewan roundabouts, diverging diamonds and RCUT interchanges.

    Starting out? The full licensing path is in Learning to drive in Saskatchewan.

    Sources

    • SGI, “Traffic signals”, Saskatchewan Driver’s Handbook (sgi.sk.ca)
    • SGI, “Stopping positions”, Saskatchewan Driver’s Handbook (sgi.sk.ca)
    • SGI, “Driver Improvement Program (Driver Licensing and Suspension Regulations)” demerit points table (sgi.sk.ca)
    • SGI, “All Traffic Offences with Demerit Points” (sgi.sk.ca)
  • Sharing Saskatchewan Roads: Pedestrians, Cyclists, Motorcycles

    Sharing Saskatchewan Roads: Pedestrians, Cyclists, Motorcycles

    Photo: waferboard, CC BY 2.0, via Wikimedia Commons

    In Saskatchewan you must yield to any pedestrian, wheelchair or medical scooter user crossing at an intersection, pass cyclists the way you would pass a car with plenty of room, never move into a lane beside a motorcycle, and expect e-scooters only in communities whose bylaws allow them. This guide sets out SGI’s rules for sharing the road with the most vulnerable road users, from the 2026-27 Saskatchewan Driver’s Handbook.

    Pedestrians: who has the right of way?

    • At an intersection, you must yield the right of way to any pedestrian crossing the street.
    • Stop before the crosswalk. It is either painted on the road or an imaginary extension of the sidewalk.
    • If the light changes while a pedestrian is still in the crosswalk, the pedestrian has the right of way.
    • Stop when a school crossing guard directs you to.
    • You may not pass a vehicle that has stopped at an intersection to let pedestrians cross.
    • Pedestrians must give drivers a chance to stop before stepping out, and when walking along a road they should use the left shoulder, facing traffic. Expect people on the shoulder on rural roads.

    Jaywalkers

    Jaywalking is crossing outside a marked or unmarked crosswalk. Always be ready to stop for someone about to step out in front of you, but do not stop and wave a jaywalker across. The driver behind may not expect you to stop, and drivers in other lanes may not see the pedestrian walking out in front of your car.

    Crossing urban streets

    You may drive across a street only at an intersection, lane or alley. Some cities ban crossing at a lane or alley by bylaw, so check local rules.

    Wheelchairs and medical scooters

    SGI counts people using a wheelchair, motorized wheelchair or medical scooter as pedestrians. The same rules apply:

    • Yield to anyone crossing in a wheelchair or medical scooter at an intersection, and stop before the crosswalk.
    • On a wide street, this does not apply if the person is a safe distance from your side of the street.
    • Do not pass a vehicle stopped to let them cross.
    • Where there is no sidewalk, they should travel on the left shoulder facing traffic, and they may use the first driveway to get onto the sidewalk if there is no accessible curb. They should also have a brightly coloured flag to make them easier to see. Watch for it, especially near driveways.

    How much room should you give a cyclist in Saskatchewan?

    SGI’s rule is to pass a cyclist as you would any other vehicle: give them room and do not pass too closely. Check your city’s bylaws for any set distance. When overtaking a bicycle or motorcycle in your lane, you must pass in the same manner as you would pass a car, which can mean changing lanes.

    The rest of SGI’s cyclist checklist:

    • Turning left: stop and wait for oncoming bicycles to pass.
    • Turning right: watch for cyclists pulling up beside you, check your blind spot, and never pull alongside a cyclist and then turn across them.
    • Intersections: scan for cyclists waiting to turn left. They are allowed to turn left the same way drivers do and need extra room on multi-lane roads.
    • Following: keep a safe following distance. Bicycles have no brake lights.
    • Speed: cyclists can travel faster than you think, up to 50 km/h going downhill.
    • Swerving: expect them to move out around drainage grates, potholes, gravel, sand, wet surfaces, ruts and even dogs.
    • Pulling out and opening doors: check for cyclists every time you leave the curb and before you open your door.
    • Horn: do not use it unnecessarily when passing. It can startle a cyclist into your path.
    • Hand signals: a cyclist may signal a right turn by holding out the right arm. Make eye contact where you can.

    E-bikes (power-assisted bicycles), including models that look like scooters with pedals, are treated the same as any other cyclist.

    Bike lanes and sharrows

    Bike lanes are reserved for cyclists. You may enter or cross one only to turn right, reach a parking space or enter a lane or driveway, and only after checking it is safe. A sharrow (bicycle symbol with chevrons) means the lane is shared; it does not mean you can pass a cyclist within the lane. The full lane rules are in the Saskatchewan rules of the road study guide.

    Motorcycles: check twice

    When a motorcycle and a car collide, the rider is at high risk of death or serious injury. Motorcycles are agile, so their moves are harder to predict, and their size makes them hard to see. SGI’s rules for drivers:

    Situation What SGI says
    Lane change or turn in riding season Check twice: once for cars and trucks, once for motorcycles and bikes
    Turning left Failing to see an oncoming motorcycle when turning left is a significant factor in motorcycle collisions. Look for it before you go
    Following Give the same three-second following distance as for any vehicle, and more on wet or slippery roads
    Passing Pass as you would a car, and leave plenty of room ahead of the motorcycle before pulling back in
    Sharing a lane Never move into a lane beside a motorcycle, even if the lane is wide and the rider is to one side. It is illegal and extremely hazardous
    Lane position A skilled rider keeps changing position within the lane to see, be seen and avoid objects. This is normal, not a sign they are about to turn
    Headlights Most motorcycles have headlights on at all times. Be alert for ones that do not

    New riders in Saskatchewan display a Motorcycle Graduated Driver Licensing placard on their licence plate: a red “L” for learners and a green “N” for novices. Give them extra space when passing or following. Riders and passengers must wear an approved motorcycle helmet, and eye protection if the bike has no windshield deflecting the air from their face. Two motorcycles may ride in the same lane, but a motorcycle may not ride beside any other type of vehicle in the same lane.

    Are e-scooters legal in Saskatchewan?

    Only in communities that have passed e-scooter bylaws. SGI classes e-scooters (electric kick scooters) as limited speed motor vehicles. Where they are allowed:

    • they do not need to be registered, and riders do not need a driver’s licence;
    • riders must be at least 16 and wear an approved helmet;
    • riders must follow municipal bylaws and provincial law.

    Rules vary between communities, so check with the municipality you are driving in. For example, the City of Regina allows shared and personal e-scooters on park and multi-use pathways, bike lanes and roads with a speed limit of 50 km/h or less, but not on sidewalks, with a top speed of 24 km/h on roadways and 15 km/h on pathways. Saskatoon also runs a shared e-scooter program; check saskatoon.ca for its current season and rules.

    As a driver, treat an e-scooter much like a cyclist: expect it in bike lanes and on the right of the road, give it room when passing, and check for it before turning right.

    Large trucks and buses

    • A truck can carry 50 or more times the weight of a car and takes longer to stop. Avoid forcing a driver to slow down, and don’t cut in front right after passing.
    • Trucks slow going uphill and pick up speed going down. Plan your pass around that.
    • Avoid the “no-zone”, the large blind spots on both sides, in front and deep behind. If you can’t see the truck’s mirrors, the driver can’t see you. Keep your headlights on.
    • Before pulling back in front of a truck, make sure you can see the entire cab in your rear-view mirror.
    • A large truck or bus has trouble with sharp corners, especially right turns. Give it room: oncoming drivers should expect it to enter their half of the road, and drivers on its right should stay well back so they aren’t caught against the curb.
    • Wind from a passing truck can push your car around. Look where you want to go and steer there.

    Emergency vehicles

    • Lights flashing or siren on: drive as close as you can to the right edge and don’t enter the next intersection until it has passed. On a one-way street, go to the nearest curb. A peace officer’s directions override this.
    • At an intersection, stop and let it through.
    • Give the same room to one with lights flashing and no siren.
    • Passing one stopped on the highway with lights on: 60 km/h maximum. This covers oncoming traffic on an undivided highway, but not the opposite side of a divided highway.
    • Never follow an emergency vehicle going to or coming from an emergency.

    Other road users in the same handbook section

    Common questions

    Do I have to stop for a pedestrian waiting at a crosswalk in Saskatchewan?

    You must yield to pedestrians who are crossing at an intersection and stop before the crosswalk. Pedestrians in turn must not step out until drivers have had a chance to stop.

    Is it legal to pass a cyclist on a solid line?

    SGI’s handbook says not to cross solid or double solid yellow lines to pass, and makes no exception for cyclists. Wait behind until it is legal and safe to pass with room.

    Will sharing the road be on the SGI written test?

    It is part of the handbook’s rules of the road chapter. See SGI written test.

    Back to learning to drive in Saskatchewan.

    Sources

    • SGI, “Saskatchewan Driver’s Handbook: A guide to safe driving 2026-27”, chapter 3, sections 3.4 Sharing the road, 3.15 Turning, 3.21 Pedestrians, 3.22 Crossing urban streets, 3.23 Wheelchairs and medical scooters and 3.24 Motorcycles (sgi.sk.ca)
    • City of Regina, “E-Scooters” (beheard.regina.ca)
  • SGI Driver’s Handbook Study Guide: Lanes, Signals and Parking

    SGI Driver’s Handbook Study Guide: Lanes, Signals and Parking

    Photo: waferboard, CC BY 2.0, via Wikimedia Commons

    This study guide covers the “rules of the road” chapter of SGI’s Saskatchewan Driver’s Handbook (2026-27 edition) that learners most often skim: the six basic driving conditions, dividing lines, lane position and selection, signalling distances, changing lanes, passing, bus and bike lanes, turning, medians, stopping and parking, curves, mountains, highways and freeways, seatbelts and the rules related to vehicles. The two numbers to learn first: SGI recommends signalling at least 30 m before a turn under 60 km/h and at least 150 m at higher speeds, and on a rural road you stop at least 30 m from any vehicle stopped on the other side. Whatever the distance, you must signal in advance of every turn or lane change.

    The six basic driving conditions

    SGI asks you to adjust your driving to six conditions. Driver condition comes first because a driver in good shape can adjust to all the others.

    Condition What SGI means
    Driver Your physical, mental and emotional fitness to drive. The most important of the six
    Vehicle Whether the car lets you control it, see and be seen, and communicate. Only you can spot defects and get them fixed
    Light Too little or too much light. SGI says the night-time fatal collision rate is more than double the daytime rate
    Weather Rain, snow and ice reduce traction; fog, spray and steamed-up glass reduce vision; high winds push the car sideways
    Road The type and surface of the road, which can change many times on one trip
    Traffic How many vehicles and pedestrians share the road, which changes with the time of day, day of the week and nearby places like schools or arenas

    Dividing lines: yellow, white and solid

    • Yellow lines separate traffic going in opposite directions.
    • White lines separate traffic going the same direction.
    • Double wide lines mark a lane that is ending, on freeways and some city streets. Be ready to exit, turn at the next intersection or merge.
    • Solid lines: you may not cross a solid line between lanes. The exceptions are a double centre line where the line nearest you is broken, and centre turning lanes.
    • Do not cross solid or double solid yellow lines to pass.

    Lane position and lane selection

    Where to sit in your lane

    • On roads with marked lanes, drive entirely within one lane. With no markings, drive as if there were.
    • On highways and rural roads, keep to the right of your lane. In urban areas you will usually drive in the middle.
    • To turn left, move to the left side of the lane. To turn right, move to the right side, leaving room to pass parked vehicles.
    • Where signs or signals allow two or more lanes to turn, finish the turn in the same relative lane you started in.

    Which lane to pick

    Choose the lane with the best view that keeps the most “gates” (escape spaces around your car) open. SGI also says:

    • on slippery roads, use the part of the lane with the most traction;
    • on a divided highway, use the left lane to approach a left turn off the highway;
    • on a multi-lane divided highway, the left lane is for passing slower vehicles and for emergency vehicles;
    • the shoulder, to the right of the solid white line, is not a driving lane. It is for stopped vehicles, emergency manoeuvres, two-point turns and preparing to turn right off a highway. Rumble strips warn you when you drift.

    How far before a turn should you signal in Saskatchewan?

    Your speed SGI recommends signalling at least
    Under 60 km/h 30 m before the turn
    Higher speeds 150 m before the corner

    The rule is that you must signal in advance of your turn or lane change. SGI calls 30 m a good rule at lower speeds.

    The order SGI teaches for any turn or lane change:

    1. Know which gates are open and be in position, then signal.
    2. Check your mirror.
    3. Shoulder check the blind spot for the gate you are moving into.
    4. Start the turn or lane change.
    5. Cancel the signal.

    Do not change lanes in an intersection. Either finish the lane change and cancel the signal before you enter, or wait until you are through. If your signal or brake lights fail, you must use hand signals for left turn, right turn and stopping or slowing.

    Changing lanes step by step

    1. Decide well in advance, and know the condition of your gates.
    2. Signal.
    3. Check your mirrors to make sure the gate is open and no one else is moving into it.
    4. Shoulder check your blind spot.
    5. Look where you want to go and steer there, accelerating gently.
    6. When you are almost in the new lane, look ahead to where you intend to drive.
    7. Cancel the signal, check your new gates and adjust your speed.

    Crossing more than one lane? Do it as one continuous move with one signal, but shoulder check for every lane.

    Blind spots

    A blind spot is the area beside your car that no mirror shows. A quick look over your shoulder toward the gate you are driving into shows it. If something is there, don’t move into that space.

    • Motorcycles and bicycles are easy to miss, especially at dusk, at dawn and in bad weather.
    • Don’t sit in another driver’s blind spot. Move forward or drop back as soon as you notice.
    • Well-adjusted mirrors shrink your blind spot significantly.

    Passing on Saskatchewan roads

    • Pass only when it is legal, safe and necessary. No passing on a hill crest, before a curve, at intersections or wherever your sight distance is limited.
    • Keep at least three seconds behind before you pull out, then accelerate throughout the pass. It is still illegal to speed while passing.
    • Return only when you can see the passed vehicle in your inside mirror, after signalling, mirror and shoulder checks.
    • Pass on the left, except where there are two or more lanes your way, or when the vehicle ahead is turning left and you can pass on the right without using the shoulder.
    • Never pass a vehicle stopped at an intersection to let pedestrians cross.
    • Being passed: stay right in your lane and keep your speed. Do not speed up.
    • Passing lanes: slower traffic moves right and keeps its speed; the left lane is only for passing. Signs warn you one is coming, so wait for it rather than using the oncoming lane.
    • If the driver passing you has misjudged, slow down and let them back in.
    • Judging a pass: on a clear stretch, time how long a pass takes you, usually 10 to 40 seconds, and add at least five seconds as a safety margin. That total is your safe passing time and the shortest sight distance you need, even with nothing coming. An oncoming car closes the gap about twice as fast as a fixed object. Practise by saying “safe” or “unsafe” and counting, without actually passing, and leave extra room when passing a motorcycle.

    Bus lanes and bike lanes

    Major centres have reserved lanes. The rules SGI sets out:

    • Bus lanes are marked by a sign with a diamond and a bus symbol showing the days and times. Some have diamond markings on the pavement. While the hours are in effect, only buses and emergency vehicles may drive in the curb lane, except to make a right turn onto or off the block.
    • Only buses, emergency vehicles, or accessible taxis loading or unloading passengers who cannot walk may stop in a bus lane.
    • Bicycle-only lanes: other vehicles may enter only to turn right, reach a parking space or enter a lane or driveway. Check for cyclists before you enter.
    • Sharrows (a bicycle symbol with chevrons) mean cyclists and drivers share the lane. A sharrow is not a bike lane and does not mean you can squeeze past within the lane. You may need to change lanes to pass a cyclist safely.

    Pavement markings vary between communities, so watch the signs in Regina, Saskatoon and other centres.

    Turning

    Right turns

    1. Plan well ahead. Signal, check your rear gate and blind spot, and when safe move as close to the right as you can.
    2. Sweep left, straight ahead, right and left again for traffic and pedestrians.
    3. Slow down, and in a manual shift to a lower gear. Check again.
    4. Turn into the first available driving lane.

    If a vehicle is parked in the curb lane near the intersection, move into that lane at the first opportunity before turning. You may not turn from the main driving lane.

    Left turns

    1. Decide early, signal, check your rear gate and blind spot, and move to the left side of the left lane.
    2. Sweep for traffic and pedestrians, slow down and check again. Watch for oncoming motorcycles.
    3. Yield to oncoming vehicles that your turn would interfere with.
    4. If you must wait in the intersection, keep the car parallel to the lane with your front wheels straight, so a hit from behind won’t push you into oncoming traffic.
    5. Turn into the first available driving lane.
    Left turn from Start Finish
    One-way street to a two-way street As close as possible to the left edge The lane immediately right of the centre line
    One-way street to a one-way street The left edge of the road The left-most driving lane
    Two-way street to a one-way street The lane next to the centre line The left-most driving lane

    On a one-way street, if a vehicle is parked in the left curb lane near the intersection, move into that lane at the first opportunity, after making sure that driver isn’t pulling over to park. For two-way left-turn lanes, see two-way left-turn lanes.

    Medians and crossing urban streets

    • Where a median, boulevard or ditch divides a road, do not drive on the left side of it.
    • Cross a median, boulevard or ditch only at an intersection or a marked cross-over.
    • On divided highways, drive in the right lane and use the left only for passing, turning left or emergencies.
    • On freeways and controlled access highways, enter and leave only at the ramps provided.

    Stopping and parking rules

    Stopping on the road

    • Move as far right as possible when you stop on a road.
    • On a rural road or highway, stop at least 30 m (98 ft.) from any vehicle stopped on the opposite side.
    • A vehicle stopped on a rural road or highway at night must be marked with flares, hazard lights or reflectors.
    • In heavy traffic, stop behind the crosswalk and before the intersection or railway crossing so you do not block anyone.
    • Come to a complete stop at all stop signs and at railway crossings where signals or gates are activated. Stop when a police officer or flagperson signals you to.
    • Do not tamper with devices marking a stopped vehicle.

    Where to stop at a stop sign or light

    Markings Stop
    Stop line At the stop line
    Crosswalk, marked or not At the nearest crosswalk
    Marked X Behind the X
    No line, sidewalk or crosswalk, in a town, city, village or hamlet Within 3 m of the intersection
    No line, sidewalk or crosswalk, in a rural area Within 10 m of the intersection

    Parking

    • Obey painted curbs and no-parking signs. For distances from hydrants or crosswalks, check your city’s parking bylaw.
    • Parallel parking: look for a space at least 2 m longer than your vehicle.
    • Right-angle stalls: SGI recommends backing in, unless it is prohibited, for a better view when you leave.
    • Hills: turn your front wheels so the car would roll into the curb, or off the road if there is no curb, and set the parking brake.
    • Parking lots: speed, signs, following distance, turns, signalling and backing rules still apply. Where aisles meet without signs, yield to the vehicle on your right. Parking aisles yield to thoroughfares.

    The two-point turn is covered with the road test manoeuvres in SGI road test.

    Curves and corners

    1. Slow down before the curve, braking in a straight line if needed.
    2. In a manual, shift to a lower gear before the curve.
    3. Look through the curve to where you want to go.
    4. Use the accelerator gently to the mid-point. More power pushes the car to the outside; easing off lets it tuck in.
    5. From the mid-point, unwind the steering and accelerate out.

    Make every speed or steering change in a curve gradual.

    Driving in mountains

    This advice matters most on trips into the Rockies, but it also applies to long hills. Sight distances are shorter, so look up, reference down and keep your speed low enough to see at least 12 seconds ahead. Going down, shift to a lower gear and brake lightly and continuously, which is least likely to overheat the brakes.

    Highways and freeways

    • When meeting other vehicles, keep right of the centre line. On two-way roads, go left of centre only when it is safe and no traffic is approaching. Never travel the wrong way on a one-way highway.
    • Stopping takes longer from higher speeds, and at speed you steer less and sooner, with no sudden moves. Drivers on the road for hours can develop “highway hypnosis”, so make your moves obvious.
    • It is safest to match other traffic if it is at a sensible speed and within the limit.
    • Cruise control suits long trips, but not urban areas, wet or slippery roads, traffic of varying speed or restricted vision.
    • Entering a freeway: choose your merge spot from the ramp, build speed in the acceleration lane, signal, shoulder check and match freeway speed. Regina’s Ring Road and Saskatoon’s Circle Drive are examples.
    • On the freeway: the right lane is for normal travel and the left for passing, though you may move over temporarily so others can merge. Keep three seconds and two open gates.
    • Leaving: signal, move into the deceleration lane and slow down there, not on the freeway. You will likely underestimate your speed.
    • Missed your exit? Don’t stop or back up. Go on to the next interchange.
    • Trouble: at the first sign, check mirrors, signal, shoulder check and pull onto the shoulder as far right as you can, with hazard lights on. Never stop on the travelled part. Stay with the car if you can, raise the hood or use four-way flashers to ask for help, and if needed get out on the side away from traffic.

    Seatbelts, car seats and airbags

    • Everyone in the vehicle must wear a seatbelt where one is provided, properly adjusted and securely fastened. Wearing one can cut your chance of being killed or seriously injured by as much as 50%.
    • Keep the lap belt low over your pelvis and snug. The shoulder belt goes over your chest, never behind your back or under your arm.
    • Drivers are legally responsible for passengers under 16. Passengers 16 and over are responsible for themselves.
    • Children under seven must be in an approved, correctly installed car seat or booster, in the back seat. See child car seat and booster rules.
    • Airbags work with seatbelts, not instead of them. Never put a child in the front seat of a car with a passenger airbag: the force can critically injure or kill an infant or small child.

    Rules related to vehicles

    SGI lists these as offences or prohibited acts:

    • Tampering with, climbing on or throwing objects at a vehicle without the owner’s permission.
    • Watching a TV, video or computer screen while driving, unless it only helps you operate the vehicle.
    • Carrying a load that is not secured or tied down. You may have to pay for any damage from these first few infractions.
    • Holding on to a moving vehicle you are not riding in, riding in a trailer, or riding on the outside of a vehicle where there is no passenger space (construction, maintenance, firefighting, police and parade vehicles excepted).
    • A passenger sitting between the driver and the driver’s door, or crowding the driver.
    • Aftermarket tint on the windshield or front side windows. You must have a clear view to the front, sides and rear.
    • Any stunt or activity likely to distract, startle or interfere with other road users.
    • Dropping burning material, or anything that could damage tires, onto the road.
    • A rear licence plate that is missing, loose, altered or covered so it cannot be read or photographed. Every vehicle must also be registered for its purpose and show the right plate.
    • Using a hand-held cellphone while driving.

    Penalties for phones, speeding and stunting are covered in Saskatchewan speeding, stunting and distracted driving.

    After a collision in Saskatchewan

    • Stop, protect the scene, check for injuries and call 9-1-1 if anyone is hurt. Move an injured person only if they are in danger, for example from fire or water.
    • Protecting the scene: turn off ignitions and put out cigarettes if gasoline has spilled, warn traffic with flares or people at each end, and turn on hazard lights. Take extra care if a truck shows a dangerous goods placard.
    • Give first aid in order of priority if you can. Do not move someone pinned in a car, but keep the head and spine supported, and stay with the injured person until help comes.
    • Report to police immediately if anyone is injured or killed, it is a hit and run, a driver seems impaired, an out-of-province vehicle is involved or a vehicle has to be towed from the scene.
    • Whatever the damage, give every other person involved your name, address, driver’s licence number and plate number. If a non-Saskatchewan vehicle is involved, or the crash is outside Saskatchewan, also give your insurer’s details.
    • Note witnesses and take photos. Don’t admit fault or offer to pay before speaking to your adjuster. If asked, you must give police a statement as a driver, passenger or witness.
    • If your vehicle touches a power line, stay inside and call SaskPower at 306-310-2220, or 9-1-1 in an emergency. Leave only if the vehicle is on fire: jump clear with feet together without touching the vehicle, then hop at least 10 metres away.
    • Seen a crash involving a power pole, fallen line or transformer? Park at least 10 metres away, touch nothing, call 9-1-1 and keep others back.
    • Report the claim to SGI online, at a claims centre or at 1-844-855-2744.

    Every province’s reporting rules: collision reporting rules by province.

    Why collisions happen, and what else impairs you

    Two-thirds of the time, the cause relates to driver condition or improper action. Common factors are inattention, failing to yield, speed for the conditions, alcohol or drugs, ignoring traffic controls, inexperience, following too closely, unsafe backing and improper lane changes or passing. Collisions peak in late afternoon and early evening, and in November and December. About 90% of collisions in rural Saskatchewan involve a single vehicle.

    • Stress and illness: worry, grief, anger, even a toothache can distract you from the thinking part of driving. If you know you are under stress, get someone else to drive.
    • Aggressive driving: don’t take traffic personally, avoid eye contact with an aggressive driver, don’t make gestures or tailgate, use your horn sparingly, and don’t block the passing or right turn lane. If someone is driving aggressively, pull over and let them pass.
    • Smoking: it is illegal to smoke with children in the vehicle. Smoke also leaves a film on the inside of your windows.
    • Tiredness: see drowsy driving in Canada. Fog and rain: see driving in rain, fog and floods.

    Common questions

    Is this chapter on the SGI written test?

    Yes. SGI’s handbook is the study book for the written test, and lane, signalling and stopping rules are core material. See SGI written test.

    Where are the roundabout rules?

    In the same chapter, under interchanges. See Saskatchewan roundabouts, diverging diamonds and RCUT interchanges.

    What are “gates”?

    SGI’s name for the four spaces in front, behind and on each side of your car. Try to keep at least two open at all times. The hazard-spotting side of this is in IPDE and eye lead time.

    Back to learning to drive in Saskatchewan. Related: sharing Saskatchewan roads.

    Sources

    • SGI, “Saskatchewan Driver’s Handbook: A guide to safe driving 2026-27”, chapter 3 Basic information and rules of the road, section 5.5 and chapter 6 Advanced driving skills, including sections 6.3, 6.4, 6.11, 6.12 and 6.13 What to do if you’re in a collision (sgi.sk.ca)
    • SGI, “Saskatchewan Driver’s Handbook” online edition, Introduction, Rev: 2026 (sgi.sk.ca)
    • SGI, “Saskatchewan Driver’s Handbook” online edition, Signalling (sgi.sk.ca)

  • Fuel-Efficient Driving Tips in Canada: Idling and Tire Pressure

    Fuel-Efficient Driving Tips in Canada: Idling and Tire Pressure

    Photo: Wiki.cullin, CC0, via Wikimedia Commons

    Fuel-efficient driving in Canada comes down to a few habits from the provincial handbooks: drive at a steady speed, accelerate gently, stay at or below the speed limit, keep your tires properly inflated and switch the engine off instead of idling. Saskatchewan’s SGI handbook says cutting your highway cruising speed from 120 km/h to 100 km/h alone can reduce fuel use by up to 20%.

    Eco-driving habits the handbooks recommend

    Habit What the handbook says
    Steady speed, smooth acceleration Aggressive driving with rapid acceleration and hard braking can raise fuel use by about 40% (SGI) or up to 25% (MPI), both citing European tests.
    Keep to the speed limit 120 km/h to 100 km/h: up to 20% less fuel (SGI, MPI). NWT: every 10 km/h above 90 km/h burns 10% more fuel.
    Be a smooth operator BC: avoid “jackrabbit” starting and stopping and drive at a steady speed.
    Plan trips Combine errands. Trips under 5 km never let the engine reach its best operating temperature (SGI, MPI). BC suggests driving to the furthest stop first.
    Cruise control on the highway Saves fuel on flat highways (Ontario, SGI). On hills, let speed drop slightly going up (SGI, MPI). Never on slippery or winter roads.
    Air conditioning Can raise fuel use by more than 20% in city driving (SGI, MPI). In town, use windows; at highway speeds, use vents, because open windows add drag.
    Manual transmission Shift at the engine speeds your owner’s manual recommends; a tachometer helps (SGI, MPI).

    BC’s ICBC handbook sums it up: good safe-driving habits can reduce fuel use by as much as 30%.

    Is idling bad for your car and your wallet?

    Every handbook says avoid it. The details differ:

    • Ontario: turn off your vehicle if parked for more than 10 seconds. Even in cold weather, engines warm up within 30 seconds.
    • Saskatchewan and Manitoba: idling for more than 10 seconds, except in traffic, wastes more fuel than stopping and restarting.
    • NWT: ten seconds of idling can use more fuel than restarting. Most engines need no more than 30 seconds of idling to circulate oil; the best way to warm up the rest of the car is to drive it.
    • British Columbia: turn the motor off if stopped for more than 60 seconds, for example at the side of the road.

    Remote starters and block heaters

    • Do not start the car too early with a remote starter; long idling wastes fuel (SGI, MPI).
    • A block heater on a timer helps in winter and can improve overall fuel economy by up to 10%. SGI says switch it on two hours before you drive; MPI says four hours. Do not leave it on overnight.

    Municipal anti-idling bylaws

    Many Canadian cities have their own idling limits, enforced with fines. One example: the City of Toronto’s Idling Control By-law limits idling to no more than one minute in a 60-minute period (as of November 2026). Rules, exemptions and fines differ by city, so check your own municipality’s website.

    Maintenance that saves fuel

    • Tire pressure: check at least monthly when the tires are cold, using the figure on the door, glove box or owner’s manual. SGI: tires under-inflated by a total of 10 psi raise fuel use by 5%. MPI: one tire under-inflated by 56 kPa (8 psi) can raise fuel use by 4% and cut 15,000 km off the tire’s life.
    • Air filter: replace it on the schedule in your owner’s manual. The SGI, MPI and NWT handbooks say a clogged filter can raise fuel use by up to 10%, but the US Department of Energy says a fuel saving only applies to older carbureted engines, and puts it at a few percent. On modern fuel-injected and diesel engines, a new filter can help acceleration but does not improve fuel economy (fueleconomy.gov).
    • Tune-ups: NWT says a poorly tuned engine can increase fuel use by up to 50%. Ontario lists worn spark plugs, dragging brakes and transmission problems.
    • Alignment: check regularly to cut tire wear and fuel use (Ontario).
    • Weight and drag: remove heavy items, wet snow, winter sand or salt, and take off roof racks and boxes when not in use (Ontario).
    • Fuelling: do not “top off” the tank; spilled fuel releases harmful vapours (Ontario).

    For a full pre-drive and periodic check, see our car controls guide.

    Driving less

    Ontario and BC both suggest the simplest saving: walk, cycle, carpool or take transit for some trips, and avoid rush hour where you can. Ontario adds: pay attention to smog alerts.

    Buying a car with fuel economy in mind

    The NWT manual says to consider fuel-efficient models first; generally, a smaller engine uses less fuel. Look for the vehicle’s EnerGuide label, which shows its fuel consumption and estimated annual fuel cost. Manitoba’s handbook also says to check fuel efficiency before buying or leasing. For inspection and registration steps, see buying your first car in Canada.

    Province by province

    • Ontario: MTO handbook, “Driving efficiently”.
    • British Columbia: Learn to Drive Smart, chapter 2, “Driving and the environment”.
    • Manitoba: MPI handbook, “Fuel Efficient Driving Techniques”.
    • Saskatchewan: SGI handbook, “Fuel-efficient driving techniques”.
    • NWT: Driver’s Manual, “Ways to improve fuel efficiency”.
    • Others: check your provincial handbook.

    Winter brings extra fuel and safety considerations: see winter driving in Canada. For the full licensing path, start at learning to drive in Canada.

    Sources

    • Government of Ontario, “The Official MTO Driver’s Handbook: Driving efficiently” (ontario.ca)
    • ICBC, “Learn to Drive Smart” (icbc.com)
    • Manitoba Public Insurance, “Manitoba Driver’s Handbook: Fuel Efficient Driving Techniques, Environmental Consequences of Driving” (apps.mpi.mb.ca)
    • SGI, “Saskatchewan Driver’s Handbook” (sgi.sk.ca)
    • Government of the Northwest Territories, “NWT Driver’s Manual: Basic” (idmv.inf.gov.nt.ca)
    • City of Toronto, “Idling and Air Quality” (toronto.ca)
    • US Department of Energy and EPA, “Keeping Your Vehicle in Shape” (fueleconomy.gov)
  • Two-Way Left-Turn Lane Rules in Canada, Plus Dual Turn Lanes

    Two-Way Left-Turn Lane Rules in Canada, Plus Dual Turn Lanes

    Photo: Chicken4War, CC BY-SA 4.0, via Wikimedia Commons

    A two-way left-turn lane is the centre lane shared by left-turning traffic from both directions. In Canada, you signal, move into it shortly before your turn, slow down, wait opposite the street or driveway you want, and turn when it is clear. It is not a passing lane or a driving lane. Saskatchewan’s handbook adds that where one is provided, you may not turn left from any other lane.

    How to use a two-way left-turn lane, step by step

    1. Check mirrors and signal left.
    2. Enter the centre lane close to your turn. Ontario says “shortly before your turn”. Saskatchewan says enter only at the point next to the property you want to reach.
    3. Slow down and move up to a spot opposite the road or driveway (Ontario).
    4. Watch for drivers coming the other way who are using the same lane to turn left. When they wait in front of you, they can block your view of oncoming traffic (Ontario, BC).
    5. Turn only when the way is clear.

    Turning left out of a driveway

    Saskatchewan’s SGI handbook says that when leaving a driveway or parking lot, you pick a gap, then drive through the centre turning lane and into the first available driving lane as quickly as possible. You do not sit in the centre lane and then merge later.

    What you must not do in a centre turn lane

    • Use it to pass (Ontario, Saskatchewan).
    • Use it as a driving lane (Saskatchewan).
    • Enter it far from where you will turn. Alberta’s Driver’s Guide says to enter only close to where you will be turning.
    • Turn left from another lane where a centre turning lane is provided (Saskatchewan).

    How far can you drive in a two-way left-turn lane?

    Provincial handbooks (Ontario, BC, Alberta, Saskatchewan, NWT) describe the position rather than a distance in metres: enter shortly before, or next to, the place you are turning. If you see a figure quoted online, check it against your provincial handbook or traffic act before relying on it. Always follow the signs and markings on the road.

    How to recognize a two-way left-turn lane

    • A centre lane marked by a solid line and a broken line on each side. ICBC notes the markings may be reversed: solid lines inside the broken lines.
    • A sign showing opposing left-turn arrows (Saskatchewan shows this sign in its handbook).
    • Alberta’s guide notes you may cross the solid yellow line to enter the lane.

    Study the pavement markings chapter of your provincial handbook so you can spot these lanes on the knowledge test.

    Dual (multiple) turning lanes

    At large intersections there may be two lanes turning left or two turning right. The usual rule is the same: stay in your lane through the turn and finish in the matching lane.

    Handbook What it says
    BC (ICBC) Read the pavement markings, lane-use signs and signals. Turning from the far-left lane, finish in the far-left lane; from the lane next to it, finish in the lane next to the far-left lane.
    Northwest Territories Approach in one of the marked lanes and turn into the corresponding lane. Dual turns are allowed only where indicated. Never swing wide or change lanes, because another vehicle could be turning beside you.
    Alberta The Driver’s Guide describes dual left and dual right turn lanes the same way: approach in the marked lane, turn into the matching lane, no swinging wide or changing lanes in the intersection.
    Ontario Where left-turn lanes are marked, turn from the marked lane and keep that lane position as you turn onto the other road.

    Scenario

    You are in the inside (left) of two left-turn lanes. Halfway through the turn you realize you need the right lane on the new road. Finish the turn in the left lane, then signal, check your mirror and blind spot and change lanes once you are on the new road. Cutting across during the turn is exactly what the NWT manual warns against.

    Regular left-turn lanes

    A single marked left-turn lane at an intersection lets you wait for a gap without holding up through traffic. ICBC says use the lane with the arrows only if you are turning left. For how to judge gaps and who yields, see the intersection guides for your province:

    Other provinces: check your provincial handbook. For the full licensing path, start at learning to drive in Canada.

    Sources

    • Government of Ontario, “The Official MTO Driver’s Handbook: Changing directions” (ontario.ca)
    • ICBC, “Learn to Drive Smart” (icbc.com)
    • SGI, “Saskatchewan Driver’s Handbook” (sgi.sk.ca)
    • Government of the Northwest Territories, “NWT Driver’s Manual: Basic” (idmv.inf.gov.nt.ca)
    • Government of Alberta, “Driver’s Guide to Operation, Safety and Licensing” (open.alberta.ca)
  • Driver’s Licence Classes in Ontario and Across Canada

    Driver’s Licence Classes in Ontario and Across Canada

    Photo: Raysonho, CC0, via Wikimedia Commons

    Ontario uses letters for its driver’s licence classes: G (with G1 and G2 as the learner and novice levels) for cars, M for motorcycles, and A, B, C, D, E and F for trucks and buses. Almost every other province and territory uses numbers instead, with Class 5 as the regular car licence and Class 7 (or a lettered stage such as 5L) as the learner level. Whichever system you are in, the rule is the same: the class on your licence must match the vehicle you drive.

    Ontario driver’s licence classes (A to M)

    The MTO handbook says Ontario has 12 licence classes. The main ones:

    Class What you can drive Also covers
    A Any tractor-trailer combination D, G
    B Any school purposes bus C, D, E, F, G
    C Any regular bus D, F, G
    D Motor vehicle over 11,000 kg gross weight, or a truck or combination where the towed vehicle is not over 4,600 kg G
    E School purposes bus, maximum 24 passengers F, G
    F Regular bus, maximum 24 passengers, and ambulances G
    G Any car, van or small truck, or a vehicle and towed vehicle up to 11,000 kg where the towed vehicle is not over 4,600 kg Not applicable
    G1 Level One: Class G vehicles with an accompanying fully licensed driver with at least four years’ experience, plus other conditions Not applicable
    G2 Level Two: Class G vehicles without an accompanying driver, with conditions Not applicable
    M Any motorcycle, including motor tricycles, limited-speed motorcycles and mopeds G under G1 conditions
    M1, M2 Graduated motorcycle levels M2: G under G1 conditions

    Ontario also has an M with L condition (limited-speed motorcycle or moped only), M with M condition (motor tricycle only), and a Class D with RV restriction (“Q”) for recreational vehicles of any weight.

    Ontario endorsements

    • Z endorsement: needed to drive any vehicle with air brakes.
    • RV (“T”) endorsement: lets Class E, F and G holders drive a recreational vehicle up to 14,000 kg.

    What licence does an Ontario car learner need?

    A G1. You then move to G2 and finally full G. Ontario requires a Class G before you can be licensed for any other class; the only exception is a motorcycle (Class M). See learning to drive in Ontario for the full G1, G2 and G path.

    Numbered licence classes in the rest of Canada

    Most provinces and territories use classes 1 to 7, sometimes with 8 and 9. The pattern is broadly similar:

    Class General meaning
    1 Semi-trailer trucks (tractor-trailers)
    2 Large buses, including school buses
    3 Large trucks (three or more axles)
    4 Small buses, taxis and ambulances
    5 Cars, vans and light trucks: the regular licence
    6 Motorcycles
    7 Learner stage in many provinces

    Exact weights, seat counts and age limits vary. Always check your provincial handbook. Two examples below show how much detail can differ.

    PEI licence classes 1 to 9

    Class Vehicles Minimum age
    1 Truck-tractor and trailer combinations with air brakes (not a bus with passengers). Also allows classes 3, 5, 8 and 9. 19
    2 Buses carrying more than 24 passengers, including school buses. Also allows classes 3, 4, 5, 8 and 9. 19 (21 for a school bus)
    3 Trucks over 14,000 kg gross mass, special mobile equipment and gooseneck trailers. Also allows 5, 8 and 9. 19
    4 Ambulances, taxis and buses carrying 24 passengers or fewer. Also allows 5, 8 and 9. 19
    5 Vehicles up to 14,000 kg, towing up to 4,500 kg (not motorcycles or buses with passengers). Also allows 8 and 9. 17
    6 Motorcycles. Also allows class 8. 17
    7 Instruction permit: classes 5, 6, 8 and 9 with an accompanying licensed driver 16
    8 Mopeds (pedal-assisted) 17
    9 Farm tractors (no road test required) 14

    PEI’s handbook says drivers in the Graduated Driver Licensing program must exit Stage 3 before they can get a Class 1, 2, 3 or 4 licence. See learning to drive in PEI.

    Northwest Territories licence classes 1 to 7

    Class Vehicles Minimum age
    1 Any vehicle or combination except a motorcycle 18
    2 Buses of any seating capacity, plus classes 3, 4 and 5 18
    3 Single vehicles with three or more axles; combinations where the towed vehicles do not exceed 4,500 kg; plus classes 4 and 5 18
    4 Buses up to 24 passengers, taxis, ambulances, plus class 5 18
    5 Two-axle vehicles (not a motorcycle, bus, taxi or ambulance), towing up to 4,500 kg, recreational vehicles, mopeds 16
    6 Motorcycles 16
    7 Learner’s licence for Class 5 vehicles (and motorcycles, for learning) 15

    The NWT uses 5P and 6P for the probationary stage. An air brake “Q” endorsement is needed for vehicles with air brakes. See learning to drive in the NWT.

    Can you upgrade to a commercial class while on GDL?

    Usually not. By jurisdiction:

    Jurisdiction Rule
    Ontario You need a Class G before any other class (except M).
    PEI Must exit Stage 3 of GDL before Class 1, 2, 3 or 4.
    NWT A probationary driver cannot upgrade to Class 1, 2, 3 or 4, and cannot apply for those classes as a probationary driver.
    Saskatchewan Novice drivers cannot obtain a commercial driver’s licence or school bus endorsement.
    Manitoba A minimum Class 5I (Intermediate) or 5A (Authorized Instruction) licence is needed to get authorized instruction in classes 2 to 4. Class 1 instruction needs a full Class 5F, and a Mandatory Entry-Level Training (MELT) course before the Class 1 road test.

    Other provinces: check your provincial handbook or licensing office before planning a commercial career around your licence dates.

    Learner class names by province

    • Ontario: G1
    • British Columbia: Class 7L (learner), then Class 7 (novice), then Class 5
    • Manitoba: Class 5L (learner), 5I (intermediate), 5F (full)
    • PEI and NWT: Class 7

    The Canadian driving licence glossary explains every code. Towing a trailer can push you into a different class: see towing a trailer as a new driver. For the full picture, start with learning to drive in Canada.

    Sources

    • Government of Ontario, “The Official MTO Driver’s Handbook: Getting your driver’s licence” (ontario.ca)
    • Government of Prince Edward Island, “Driver’s Handbook” (princeedwardisland.ca)
    • Government of the Northwest Territories, “NWT Driver’s Manual: Basic” (idmv.inf.gov.nt.ca)
    • SGI, “Saskatchewan Driver’s Handbook” (sgi.sk.ca)
    • Manitoba Public Insurance, “Class Licence System” (apps.mpi.mb.ca)
    • ICBC, “Learn to Drive Smart” (icbc.com)
  • Car Controls for Beginners in Canada: Seat, Mirrors and Gears

    Car Controls for Beginners in Canada: Seat, Mirrors and Gears

    Photo: ZhiCheng Zhang, Pexels

    Before your first drive in Canada, set up the car in this order: seat, head restraint, mirrors, seatbelt. Sit upright with a slight bend in your knees and elbows, at least 25 cm (10 inches) back from the steering-wheel airbag, and hold the wheel at “9 and 3”. That is what the ICBC, SGI and NWT handbooks teach. Then learn where every control is so you can use the wipers, lights and defroster without looking down.

    Car set-up checklist before you drive

    1. Seat, then head restraint, then mirrors, then seatbelt.
    2. Steering wheel adjusted if it tilts or telescopes.
    3. Doors locked, loose items stored.
    4. Know where the lights, wipers, horn, hazard lights and defroster are.

    ICBC says never adjust your seat or steering wheel while the vehicle is moving.

    How to adjust your seat

    Handbook Seat position test
    BC (ICBC) Sit upright with the small of your back pushed into the seat. With your right foot you can reach the floor behind the brake pedal and still have a slight bend in your leg. Arms slightly bent on the wheel. Left foot rests to the left of the brake or clutch.
    Saskatchewan (SGI) Sit well back. Move the seat so your right foot is on the floor under the brake and your leg stays slightly bent even when you push hard. Your eye line should be about halfway between the top of the wheel and the top of the windshield, with at least a fist’s space above your head. Use a cushion if needed.
    Ontario (MTO) Sit high enough to see over the wheel and hood and to see the ground four metres in front. Check by placing your feet flat on the floor under the brake pedal without stretching. Elbows slightly bent.

    Airbag distance

    ICBC and the NWT manual (citing Transport Canada) both say to sit at least 25 cm (10 inches) from the steering wheel airbag. Airbags do not replace seatbelts: every handbook says to buckle up anyway.

    How high should the head restraint be?

    • BC: top at least level with the top of your head, and as close to the back of your head as possible. ICBC says closer restraints can be twice as effective at preventing injury.
    • Saskatchewan: top edge level with the top of your head.
    • NWT: centre of the restraint level with the top of your ears, with less than 10 cm (4 inches) between your head and the restraint.
    • Ontario: the back of your head should be directly in front of the middle of the restraint.

    The aim is the same in all of them: a well-placed restraint helps prevent whiplash in a rear-end crash. Check passengers’ restraints too.

    Setting your mirrors to cut blind spots

    1. Inside mirror: frame as much of the rear window as possible, with your head where it will be while driving.
    2. Left mirror: lean your head toward the driver’s window, then set the mirror so you can just see the side of your car (Ontario, SGI).
    3. Right mirror: lean toward the centre of the car and set it so you can just see a sliver of the right side.

    Set this way, the side mirrors pick up where the inside mirror leaves off. Mirrors never cover everything: Ontario says shoulder checks are the only way to be sure your blind spots are clear. Some side mirrors are convex; ICBC warns they make vehicles look smaller and further away.

    Where to put your hands on the steering wheel

    Handbook Recommended hand position
    BC 9 and 3, or 10 and 2. With a steering-wheel airbag, 9 and 3 or even 8 and 4 may be better, because at 10 and 2 your hands could hit your face if the airbag deploys.
    Saskatchewan 9 and 3, or 8 and 4. A hand on top of the wheel can be forced into your face by the airbag.
    NWT 9 and 3.

    Keep both hands on the outside of the wheel (ICBC). Never steer with one finger or the flat palm of your hand (Ontario).

    Hand-over-hand vs push-pull steering

    This is where the handbooks differ most.

    • Ontario: teaches hand-over-hand for sharp turns. After the turn, relax your grip and let the wheel slip, or feed it through your hands, back to straight.
    • NWT: hand-over-hand to turn and hand-over-hand to straighten out again.
    • Saskatchewan: for normal steering, keep your grip in place and twist the wheel until your forearms touch. Beyond that, use either hand-over-hand (for sharp turns at low speed or in slippery emergencies) or hand-to-hand, also called push-pull. SGI says to unwind with hand-over-hand and not to let the wheel slide through your hands, because you lose control of where it stops. It notes push-pull keeps your hands from crossing the wheel, which lowers the chance of injury from the airbag.

    For the road test, use the method your provincial handbook teaches and ask your instructor which one examiners expect.

    Gearshift positions explained

    Position What it is for
    P (Park) Starting the engine and parking. Locks the transmission.
    R (Reverse) Backing up. Turns on the white reversing lights.
    N (Neutral) Out of gear. ICBC: use it to restart the engine if the car stalls while moving.
    D (Drive) Normal forward driving; the car changes gear itself.
    L, 1, 2, 3 Lower gears that stop the transmission shifting up. Use for steep hills or heavy loads (ICBC, NWT).

    Some cars also have an overdrive setting, which the NWT manual says saves fuel at higher speeds. Check your owner’s manual for your car’s layout.

    Standard (manual) transmission and the clutch

    • Clutch with your left foot only; brake and gas with your right foot (ICBC).
    • Start the engine in neutral with the clutch fully pressed (NWT).
    • The “friction point” is where the clutch starts to connect as you lift it. Balance it with the gas for a smooth start without stalling (NWT).
    • Do not “ride the clutch” by resting your foot on it while moving; it wears the clutch out (ICBC, NWT).
    • When stopping, brake first and press the clutch just before you stop, so you are not coasting (ICBC).

    Deciding which to take your road test in? See automatic or manual for your road test.

    Accelerating and braking smoothly

    • Press the accelerator gradually and let the car build speed (SGI). NWT: do not accelerate so hard your tires spin.
    • Use your right foot for both pedals so you never press both at once (Ontario).
    • Learn how much pressure your brakes need. Power brakes need less than standard brakes (ICBC).
    • Wear proper shoes: ICBC warns against high heels and platform soles.

    Wipers, defroster and lights: learn them without looking

    Ontario says you should be able to turn on the wipers and washers, headlights, high beams, heater and defroster without taking your eyes off the road. Practise in the driveway with the engine off. ICBC adds: know every wiper speed and how to use the washer, and keep the blades in good condition. Never use cruise control on wet, snowy or icy roads, in city traffic, on winding roads or when you are tired (ICBC).

    Dashboard warning lights

    ICBC’s handbook shows a typical control panel. The lights that matter most to a learner:

    Light What it means
    Brake warning Parking brake is on. If it comes on while using the foot brake, the brake system may not be working properly: have it checked.
    ABS If it stays on after you start the car, the anti-lock system may have a fault.
    Airbag If it comes on while driving, there may be an airbag fault.
    Oil pressure Shows oil pressure, not how much oil is in the engine.
    Engine temperature Coolant temperature; warns if the engine is overheating.
    Alternator / battery Whether the battery is charging.
    Check engine A possible engine fault.
    Low tire pressure One or more tires are low.
    Electronic stability control Shows the car is equipped with electronic stability control.
    High beam indicator Usually blue: your high beams are on.

    Colours and symbols vary between makes, so check your owner’s manual. Ontario’s rule of thumb: if a warning light stays on after you drive away, it could mean a serious problem.

    Pre-trip and periodic checks

    ICBC recommends a quick walk-around before every drive: tires, lights and signals, glass, fluid patches under the car, and nothing in front or behind. Every few weeks, do a fuller check of oil, coolant, washer fluid, brake fluid, hoses, belts, lights, wipers and tire pressure (checked cold, using the figure on the driver’s door or in the manual, not the number on the tire). For what your car needs to pass inspection before a road test, see road test car checklist for Canada.

    Next steps: learn how to handle problems in car emergencies in Canada, look up terms in the Canadian driving licence glossary, or start at learning to drive in Canada.

    Sources

    • ICBC, “Learn to Drive Smart” (icbc.com)
    • SGI, “Saskatchewan Driver’s Handbook” (sgi.sk.ca)
    • Government of the Northwest Territories, “NWT Driver’s Manual: Basic” (idmv.inf.gov.nt.ca)
    • Government of Ontario, “The Official MTO Driver’s Handbook: Getting ready to drive” (ontario.ca)
    • Government of Ontario, “The Official MTO Driver’s Handbook: Changing directions” (ontario.ca)
    • Government of Ontario, “The Official MTO Driver’s Handbook: Stopping” (ontario.ca)
  • Drowsy Driving in Canada: Warning Signs, Breaks and Penalties

    Drowsy Driving in Canada: Warning Signs, Breaks and Penalties

    Photo: Ken Lund, CC BY-SA 2.0, via Wikimedia Commons

    Drowsy driving in Canada is treated as a form of impairment. Alberta’s government says plainly that driving while tired is impaired driving, and in the Northwest Territories police can give you a 24-hour roadside suspension if they have reasonable grounds to suspect you are fatigued. If you notice the warning signs below, the only real fix is to get off the road and rest.

    Warning signs that you are too tired to drive

    Ontario’s MTO handbook lists eight signs that drowsiness has reached a dangerous level. In plain terms:

    1. You struggle to keep your eyes open.
    2. Your head keeps nodding forward.
    3. Your mind wanders and you cannot concentrate.
    4. You keep yawning.
    5. You cannot remember the last few kilometres.
    6. You miss traffic lights or signals.
    7. You drift into the next lane and jerk back.
    8. You drift off the road and only just avoid a crash.

    Ontario says if you have even one of these, you may be about to fall asleep, and research shows you can fall asleep without being aware of it.

    Other handbooks add earlier clues:

    • Saskatchewan: an early sign is that you stop scanning properly and stare straight ahead instead of looking well down the road.
    • Alberta: fatigue can leave you unable to react to something on the road, taking bigger risks, reacting more emotionally or aggressively, and closing your eyes for longer.
    • Nova Scotia: “highway hypnosis” can leave you disoriented and drowsy on long, steady drives.

    Is drowsy driving illegal in Canada?

    Jurisdiction What the official source says
    Alberta Driving while tired is impaired driving. Being awake for 17 to 19 hours is equivalent to a blood alcohol content of 0.05%.
    Northwest Territories Driving fatigued is considered impaired driving. You can be issued a 24-hour roadside suspension if there are reasonable grounds to suspect you are fatigued (Motor Vehicles Act, section 116.1).
    Ontario The handbook says tired drivers can be as impaired as drunk drivers, with slower reactions and less alertness.
    Manitoba The handbook compares being drowsy or “half asleep” to a drugged condition.
    Other provinces Check your provincial handbook. Do not drive when tired.

    For alcohol, drugs and roadside suspensions, see impaired driving in Canada for new drivers.

    Who is most at risk, and when?

    • Time of day: Ontario says drowsiness crashes tend to happen late at night and early morning (2 a.m. to 6 a.m.) and in the late afternoon (2 p.m. to 4 p.m.).
    • Shift workers: Ontario lists shift workers, people with undiagnosed or untreated sleep disorders, and commercial drivers as higher risk. If you think you may have a sleep problem, ask your doctor.
    • Long, steady drives: Saskatchewan warns the chance of falling asleep is high on long straight roads; Manitoba says drowsiness usually comes from steady driving or starting out tired.
    • New drivers: driving still takes a lot of concentration when you are learning, and several provinces restrict late-night driving for new drivers. Compare those rules in Canadian graduated licensing compared.

    What makes fatigue worse

    The NWT manual lists causes: lack of sleep, emotional stress, boredom, long periods of driving, physical activity, sickness and eye strain. It adds that overeating, alcohol or drugs, warm sunshine, a warm car and carbon monoxide from a leaky exhaust can all increase the effect. Have your exhaust checked whenever the car is serviced.

    What actually helps

    • Start rested. Every handbook puts this first.
    • Take breaks. The NWT manual says stop and walk around your vehicle at least once every two hours.
    • Share the driving. Saskatchewan: change drivers when you start to feel tired.
    • Nap somewhere safe. Ontario: park in a safe, secure place such as a well-lit rest stop or truck stop, lock the doors, close the windows and sleep.
    • If you must stop by the road: Manitoba says pull well over and turn on your four-way flashers so you are not hit.
    • Keep the car comfortable and ventilated, keep your eyes moving, and wear sunglasses on bright days (NWT).
    • No cruise control when overtired (Nova Scotia).

    What does not work

    Ontario is clear that stimulants are never a substitute for sleep. Caffeine helps briefly, but if you are short of sleep the effect wears off quickly. Turning up the radio or opening a window does not work either. Saskatchewan’s handbook makes the same point about caffeine: the effect can wear off suddenly, and the only remedy for fatigue is to pull off the road and sleep. Rumble strips on some Saskatchewan highways can alert you that you have drifted, but by then you are already too tired to be driving.

    A quick plan for a long trip

    1. Sleep properly the night before. Avoid starting a long drive after a night shift.
    2. Plan stops every two hours or so, and pick rest areas in advance.
    3. Travel with another fully licensed driver if your licence rules allow it, and swap regularly.
    4. Avoid the 2 a.m. to 6 a.m. window if you can.
    5. At the first warning sign, stop. Do not try to push on to the next town.

    Night driving brings its own risks: see night driving in Canada. For the full licensing path, start with learning to drive in Canada.

    Sources

    • Government of Ontario, “The Official MTO Driver’s Handbook: Dealing with particular situations” (ontario.ca)
    • Government of Alberta, “Preventing impaired driving” (alberta.ca)
    • Government of the Northwest Territories, “NWT Driver’s Manual: Basic” (idmv.inf.gov.nt.ca)
    • SGI, “Saskatchewan Driver’s Handbook” (sgi.sk.ca)
    • Manitoba Public Insurance, “Manitoba Driver’s Handbook: Drowsiness or Fatigue” (apps.mpi.mb.ca)
    • Government of Nova Scotia, “Driver’s Handbook” (novascotia.ca)
  • When to Use High Beams in Canada: Night Driving and Glare

    When to Use High Beams in Canada: Night Driving and Glare

    Photo: Jaykumar Bherwani, Pexels

    When to use high beams in Canada: on dark roads with no one close by, then dip to low beams when another vehicle comes within the distance your province sets. In Ontario that is 150 metres for oncoming traffic and 60 metres when you are following. Alberta and the Northwest Territories set 300 metres oncoming and 150 metres following. The distances differ more than most learners expect, so check the table below for your province.

    High-beam dipping distances by province

    Province or territory Dip for oncoming vehicles within Dip when following within Source
    Ontario 150 m 60 m MTO handbook
    British Columbia 150 m 150 m ICBC Learn to Drive Smart
    Alberta 300 m 150 m Use of Highway and Rules of the Road Regulation, s. 56
    Saskatchewan at least 200 m in advance 100 m (also when being passed) SGI handbook
    Manitoba at least 450 m 60 m MPI handbook
    Northwest Territories 300 m 150 m NWT Driver’s Manual
    Nova Scotia 150 m 60 m Using the Road Regulations, s. 76 (on a divided highway you only need to dip for oncoming traffic if your lights could affect the other driver)
    Prince Edward Island 150 m 60 m PEI Driver’s Handbook

    Quebec, New Brunswick, Newfoundland and Labrador, Yukon and Nunavut: check your provincial handbook for the exact figures.

    A few extra rules from the handbooks:

    • Ontario: the rules apply on all roads, including divided ones. On country roads, switch to low beams at curves and hilltops so you can see oncoming lights and will not dazzle anyone.
    • Saskatchewan: you do not need to dip for oncoming traffic on a divided highway where the roadways are 22 metres or more apart. Turn off spotlamps within 500 metres of oncoming traffic.
    • NWT: use low beams for oncoming traffic even on divided highways.
    • PEI: use low beams in city driving except on unlit streets where traffic allows. Do not wait for the other driver to dip first.

    When headlights must be on

    Province or territory Headlights required
    Ontario From half an hour before sunset to half an hour after sunrise (as the handbook words it), and when you cannot clearly see people or vehicles within 150 m
    British Columbia From 30 minutes after sunset to 30 minutes before sunrise, and when visibility is under 150 m
    Alberta and NWT “Night time” is defined as one hour after sunset to one hour before sunrise; also when you cannot see clearly 150 m ahead
    Saskatchewan Half an hour after sunset to half an hour before sunrise, and whenever visibility is poor
    Manitoba Half an hour before sunset to half an hour after sunrise (handbook), and when visibility drops to 60 m
    Nova Scotia At night, and any time fog, rain, snow or poor light limits visibility (Using the Road Regulations, s. 72, in force 19 October 2026)
    PEI Sunset to sunrise, and when visibility is poor

    The simple habit that covers every province: if it is getting dark or visibility is poor, headlights on.

    Daytime running lights are not headlights

    Many learners assume their car is lit because the dashboard is lit or the daytime running lights (DRLs) are on. Often the tail lights are off.

    • Ontario: DRLs must not be used as headlights in poor light. They do not turn on other required lights such as tail lights. Use the automatic setting if your car has it.
    • British Columbia: it is illegal to drive at night with parking lights or DRLs instead of headlights.
    • NWT: DRLs are only at the front; the tail lights and dash lights will not be on.
    • Saskatchewan and Nova Scotia: both warn the same and tell you to switch headlights on at night.
    • PEI: parking lights are for parking only.

    What does overdriving your headlights mean?

    You are overdriving your headlights when you are going so fast that your stopping distance is longer than the distance your lights show you. If something appears at the edge of the beam, you cannot stop in time.

    Handbook Low beams light about High beams light about
    British Columbia 30 m 100 m
    Manitoba 30 m 110 m

    How to avoid it:

    • Slow down at night, especially on unlit roads (Ontario).
    • Be careful on curves: BC says overdriving is especially dangerous there.
    • Do not be fooled by reflective signs. Ontario warns they can make you think you can see further than you really can.
    • Saskatchewan suggests you should be able to see about 12 seconds ahead at night, which means using high beams most of the time on open roads and looking beyond the lit area.

    Watch for wildlife at the edges of the beam on rural roads: see moose, deer and caribou.

    Glare from oncoming lights and low sun

    At night

    • Do not look at oncoming headlights. Ontario says look up, beyond and slightly to the right of them; NWT, Manitoba and PEI say look toward the right edge of the road.
    • If the other driver does not dip, keep yours on low beam anyway (Nova Scotia).
    • For glare from behind, adjust your mirror or flip a day-night mirror to “night” (Manitoba, Saskatchewan).
    • Saskatchewan says it can take up to five seconds to recover from glare, and up to 25 seconds as people age. If you think you have a problem, see an optometrist or ophthalmologist.
    • Keep the inside of the windshield and your headlights clean. Keep interior lights off so your eyes stay adapted (Manitoba).

    In daytime

    • Use your sun visor and keep good sunglasses in the car (Ontario, Nova Scotia).
    • Entering a tunnel or underground garage on a bright day: slow down, remove sunglasses and turn on your headlights.
    • Nova Scotia: if glare is so bad you cannot see, stop on the roadside well away from traffic until you can drive safely.

    Night driving and new driver rules

    Several provinces limit when new drivers can drive at night or who can ride with them. Those curfews are compared in Canadian graduated licensing compared. Night driving also makes tiredness more likely; see drowsy driving in Canada. For fog and rain, which cause the same visibility problems, see driving in rain, fog and floods. If your headlights fail while driving, see car emergencies in Canada. The full licensing path is in learning to drive in Canada.

    Sources

    • Government of Ontario, “The Official MTO Driver’s Handbook: Getting ready to drive” (ontario.ca)
    • Government of Ontario, “The Official MTO Driver’s Handbook: Driving at night and in bad weather” (ontario.ca)
    • ICBC, “Learn to Drive Smart” (icbc.com)
    • Alberta King’s Printer, “Use of Highway and Rules of the Road Regulation, AR 304/2002” (kings-printer.alberta.ca)
    • SGI, “Saskatchewan Driver’s Handbook” (sgi.sk.ca)
    • Manitoba Public Insurance, “Manitoba Driver’s Handbook: Night Driving, Reduced Visibility” (apps.mpi.mb.ca)
    • Government of the Northwest Territories, “NWT Driver’s Manual: Basic” (idmv.inf.gov.nt.ca)
    • Government of Nova Scotia, “Driver’s Handbook” (novascotia.ca)
    • Government of Prince Edward Island, “Driver’s Handbook” (princeedwardisland.ca)
    • Government of Nova Scotia, “Using the Road Regulations” under the Traffic Safety Act, in force 19 October 2026, sections 2, 72 and 76 (novascotia.ca)